
Recommendations in Email through Unbxd Recs
The following document details out on using recommendation in email through Unbxd Recs
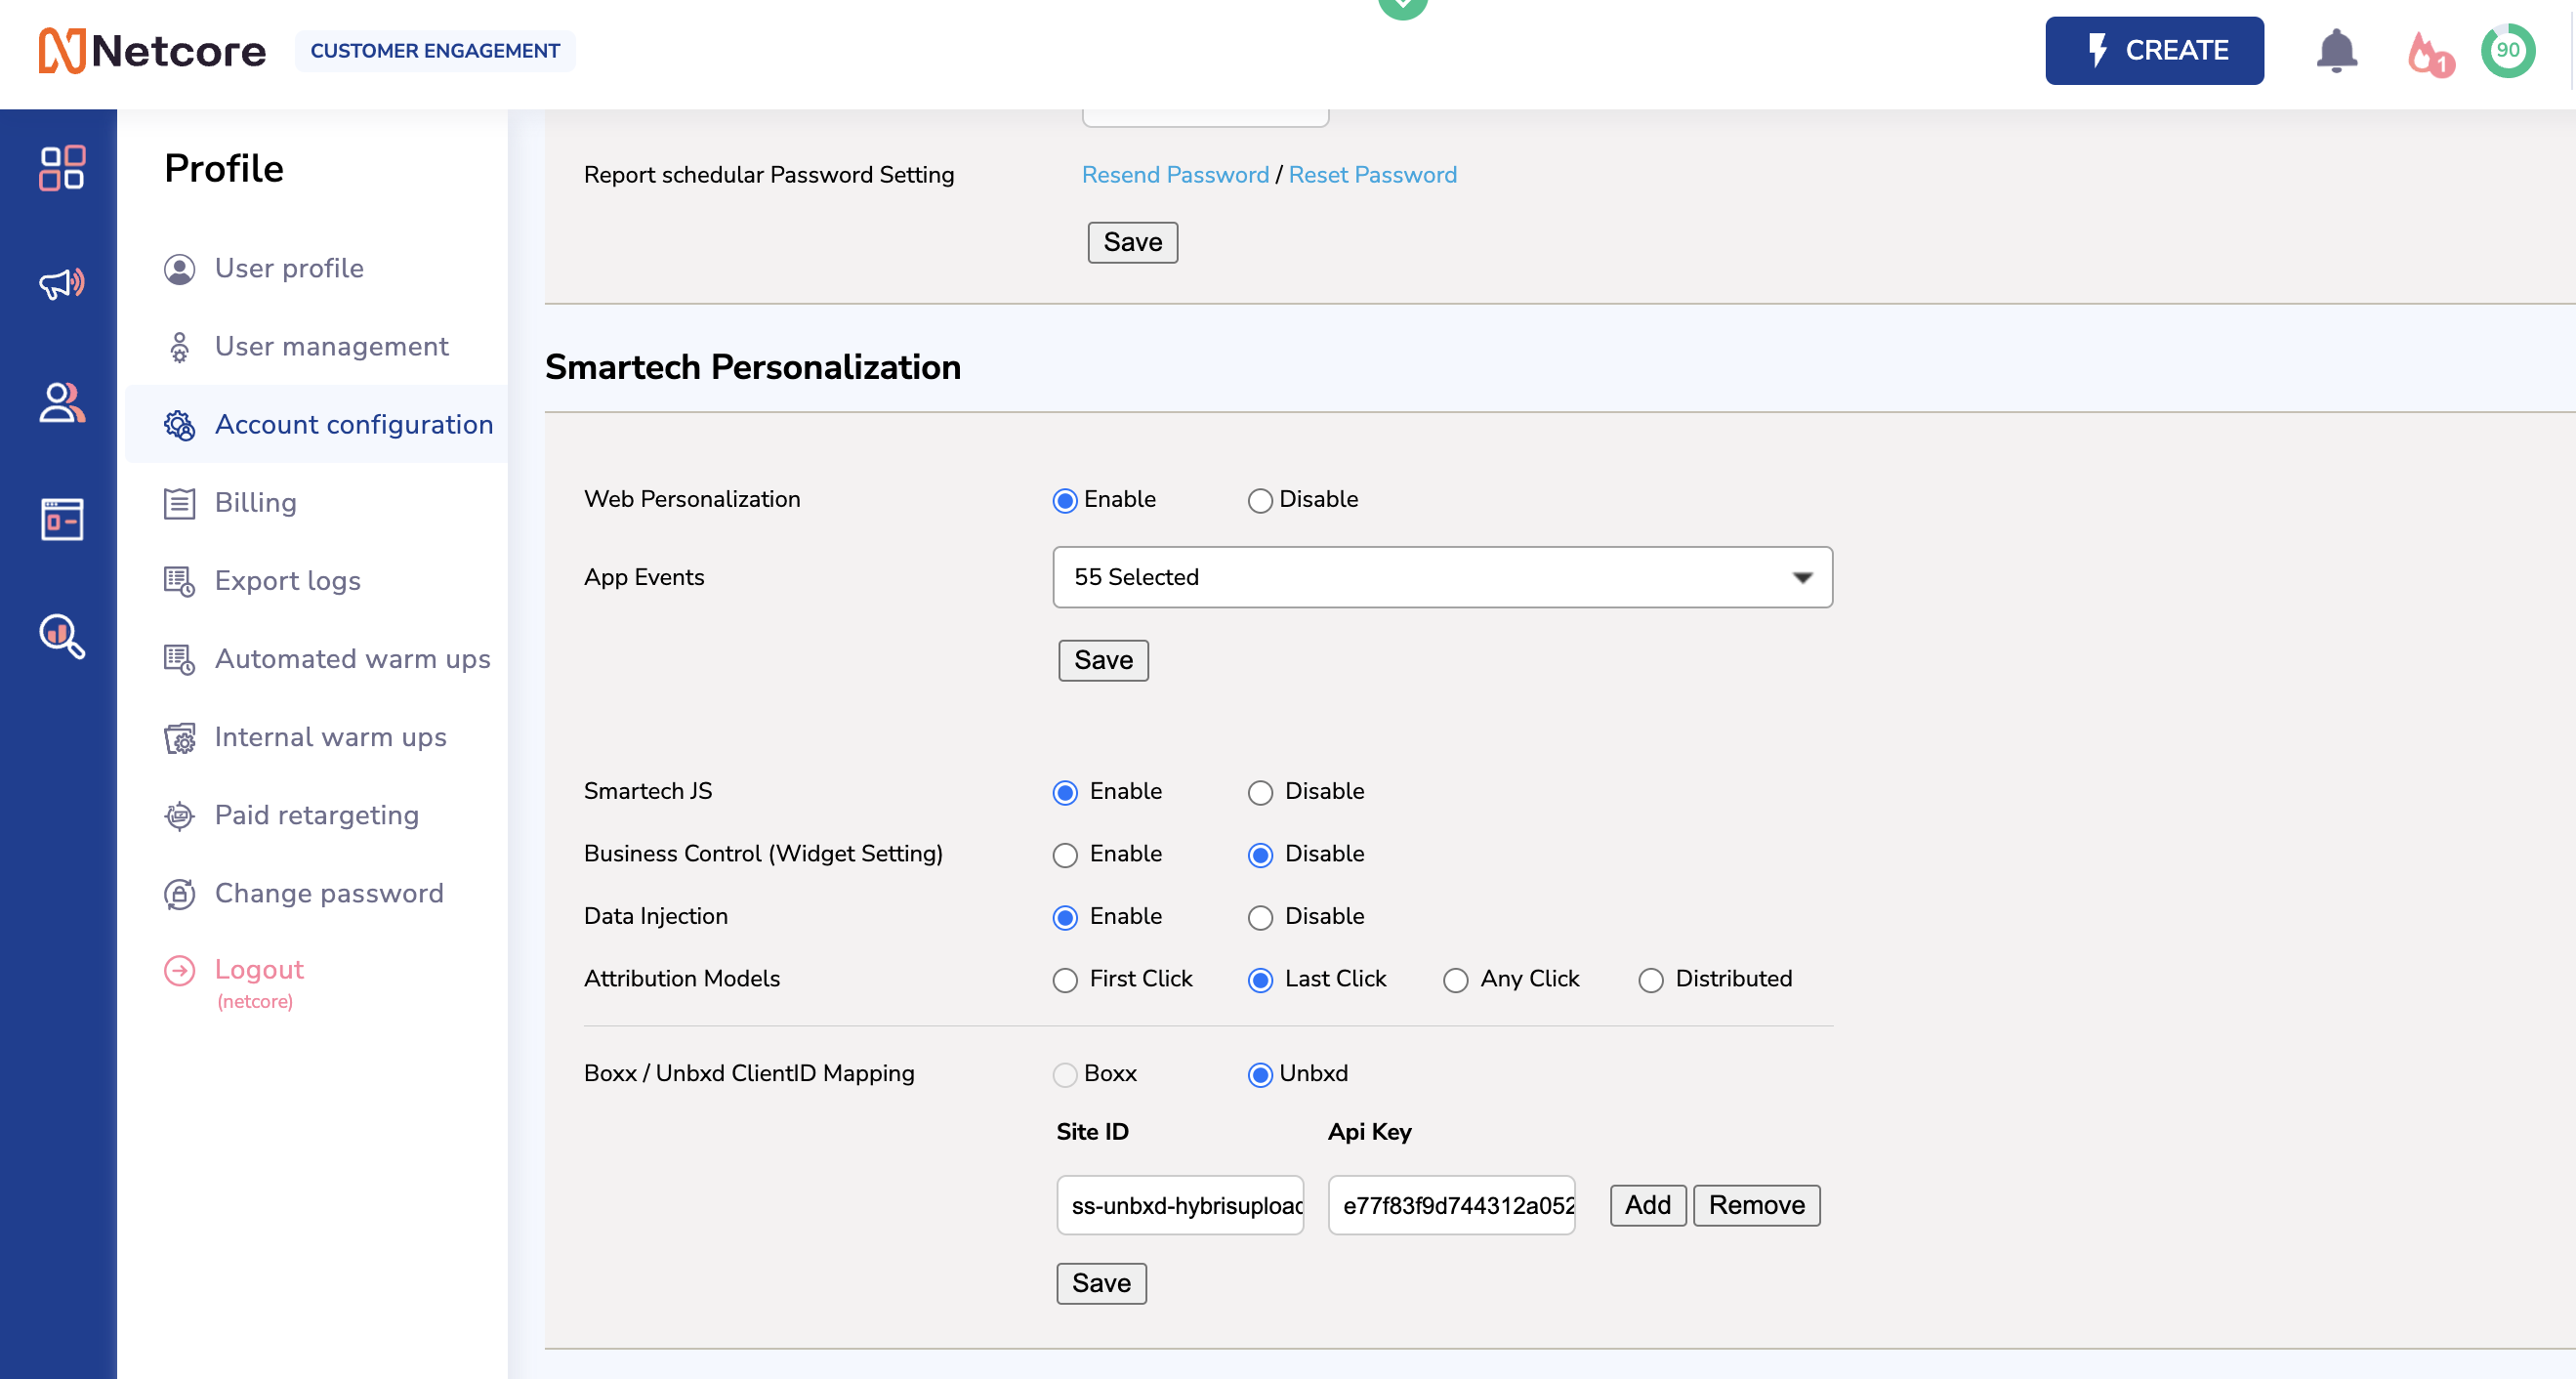
Mapping your Unbxd Recs console to Netcore Panel
Primarily done through your onboarding manager, your Unbxd Recs console needs to be mapped with your Netcore Panel as a perquisite
-
For your required Unbxd console, collect sitekey and the API key.
-
Under Profile, go into "Account configuration" and map the Unbxd Sitekey to "Site ID" and API key to "API Key" and Save.
-
Once saved, your all set to use the Recommendations in Email.
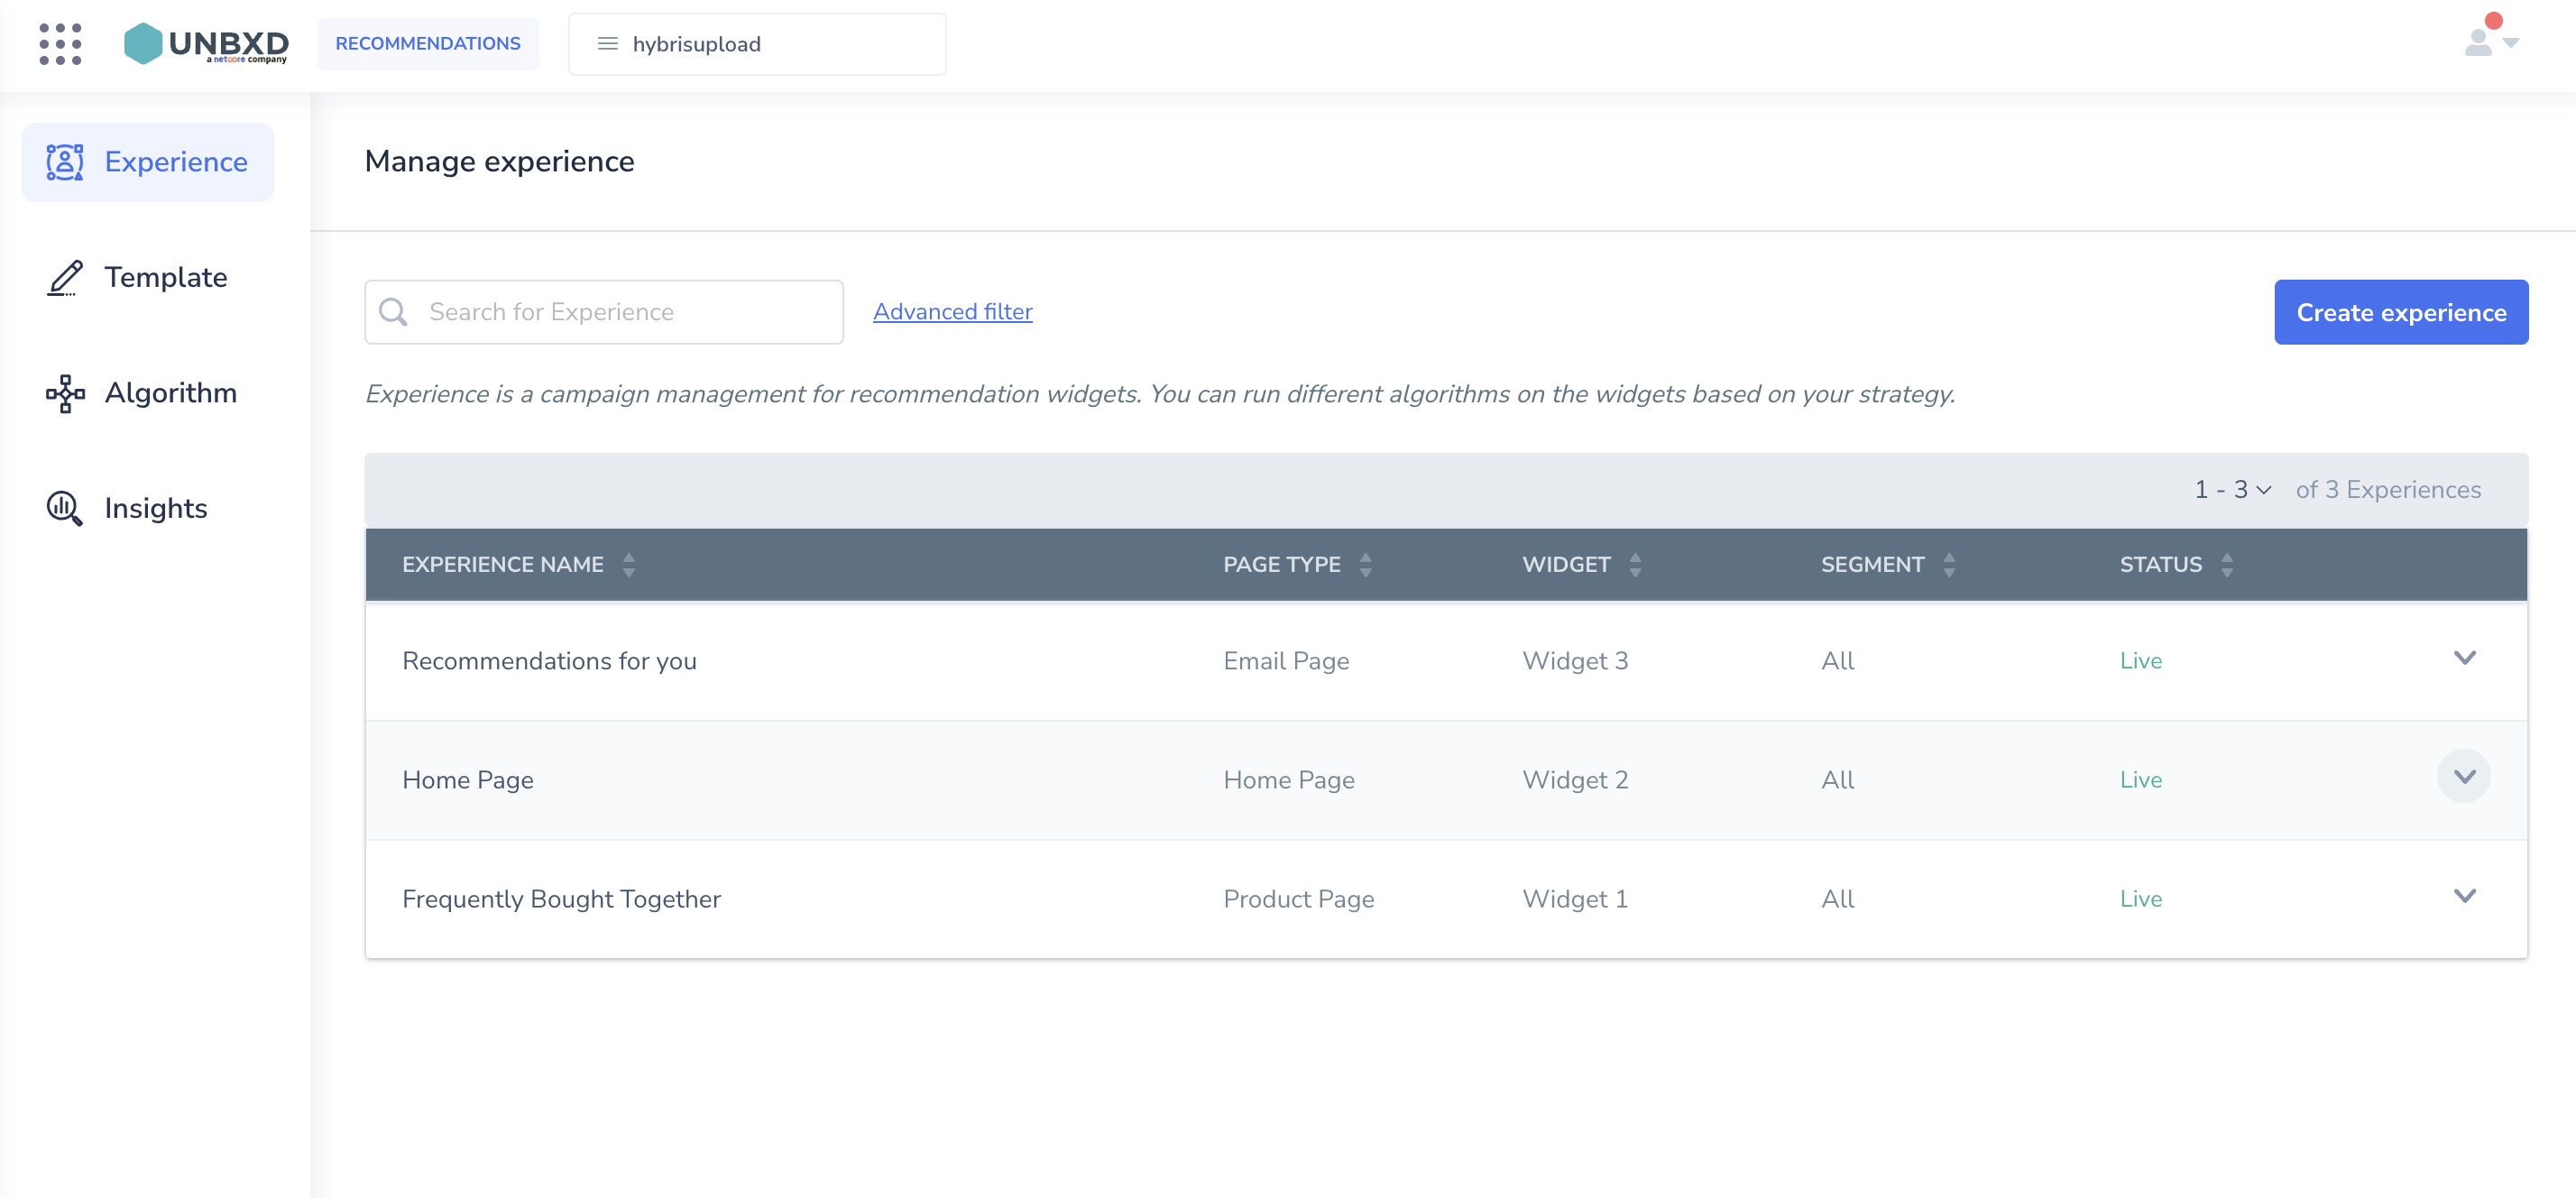
Setting up Recommendation experiences on Unbxd Recs
-
To send out recommendation templates, first step of the process is to setup your email experiences and the algorithms on the Unbxd Console.
-
Go into the experience section of your Unbxd Console.
-
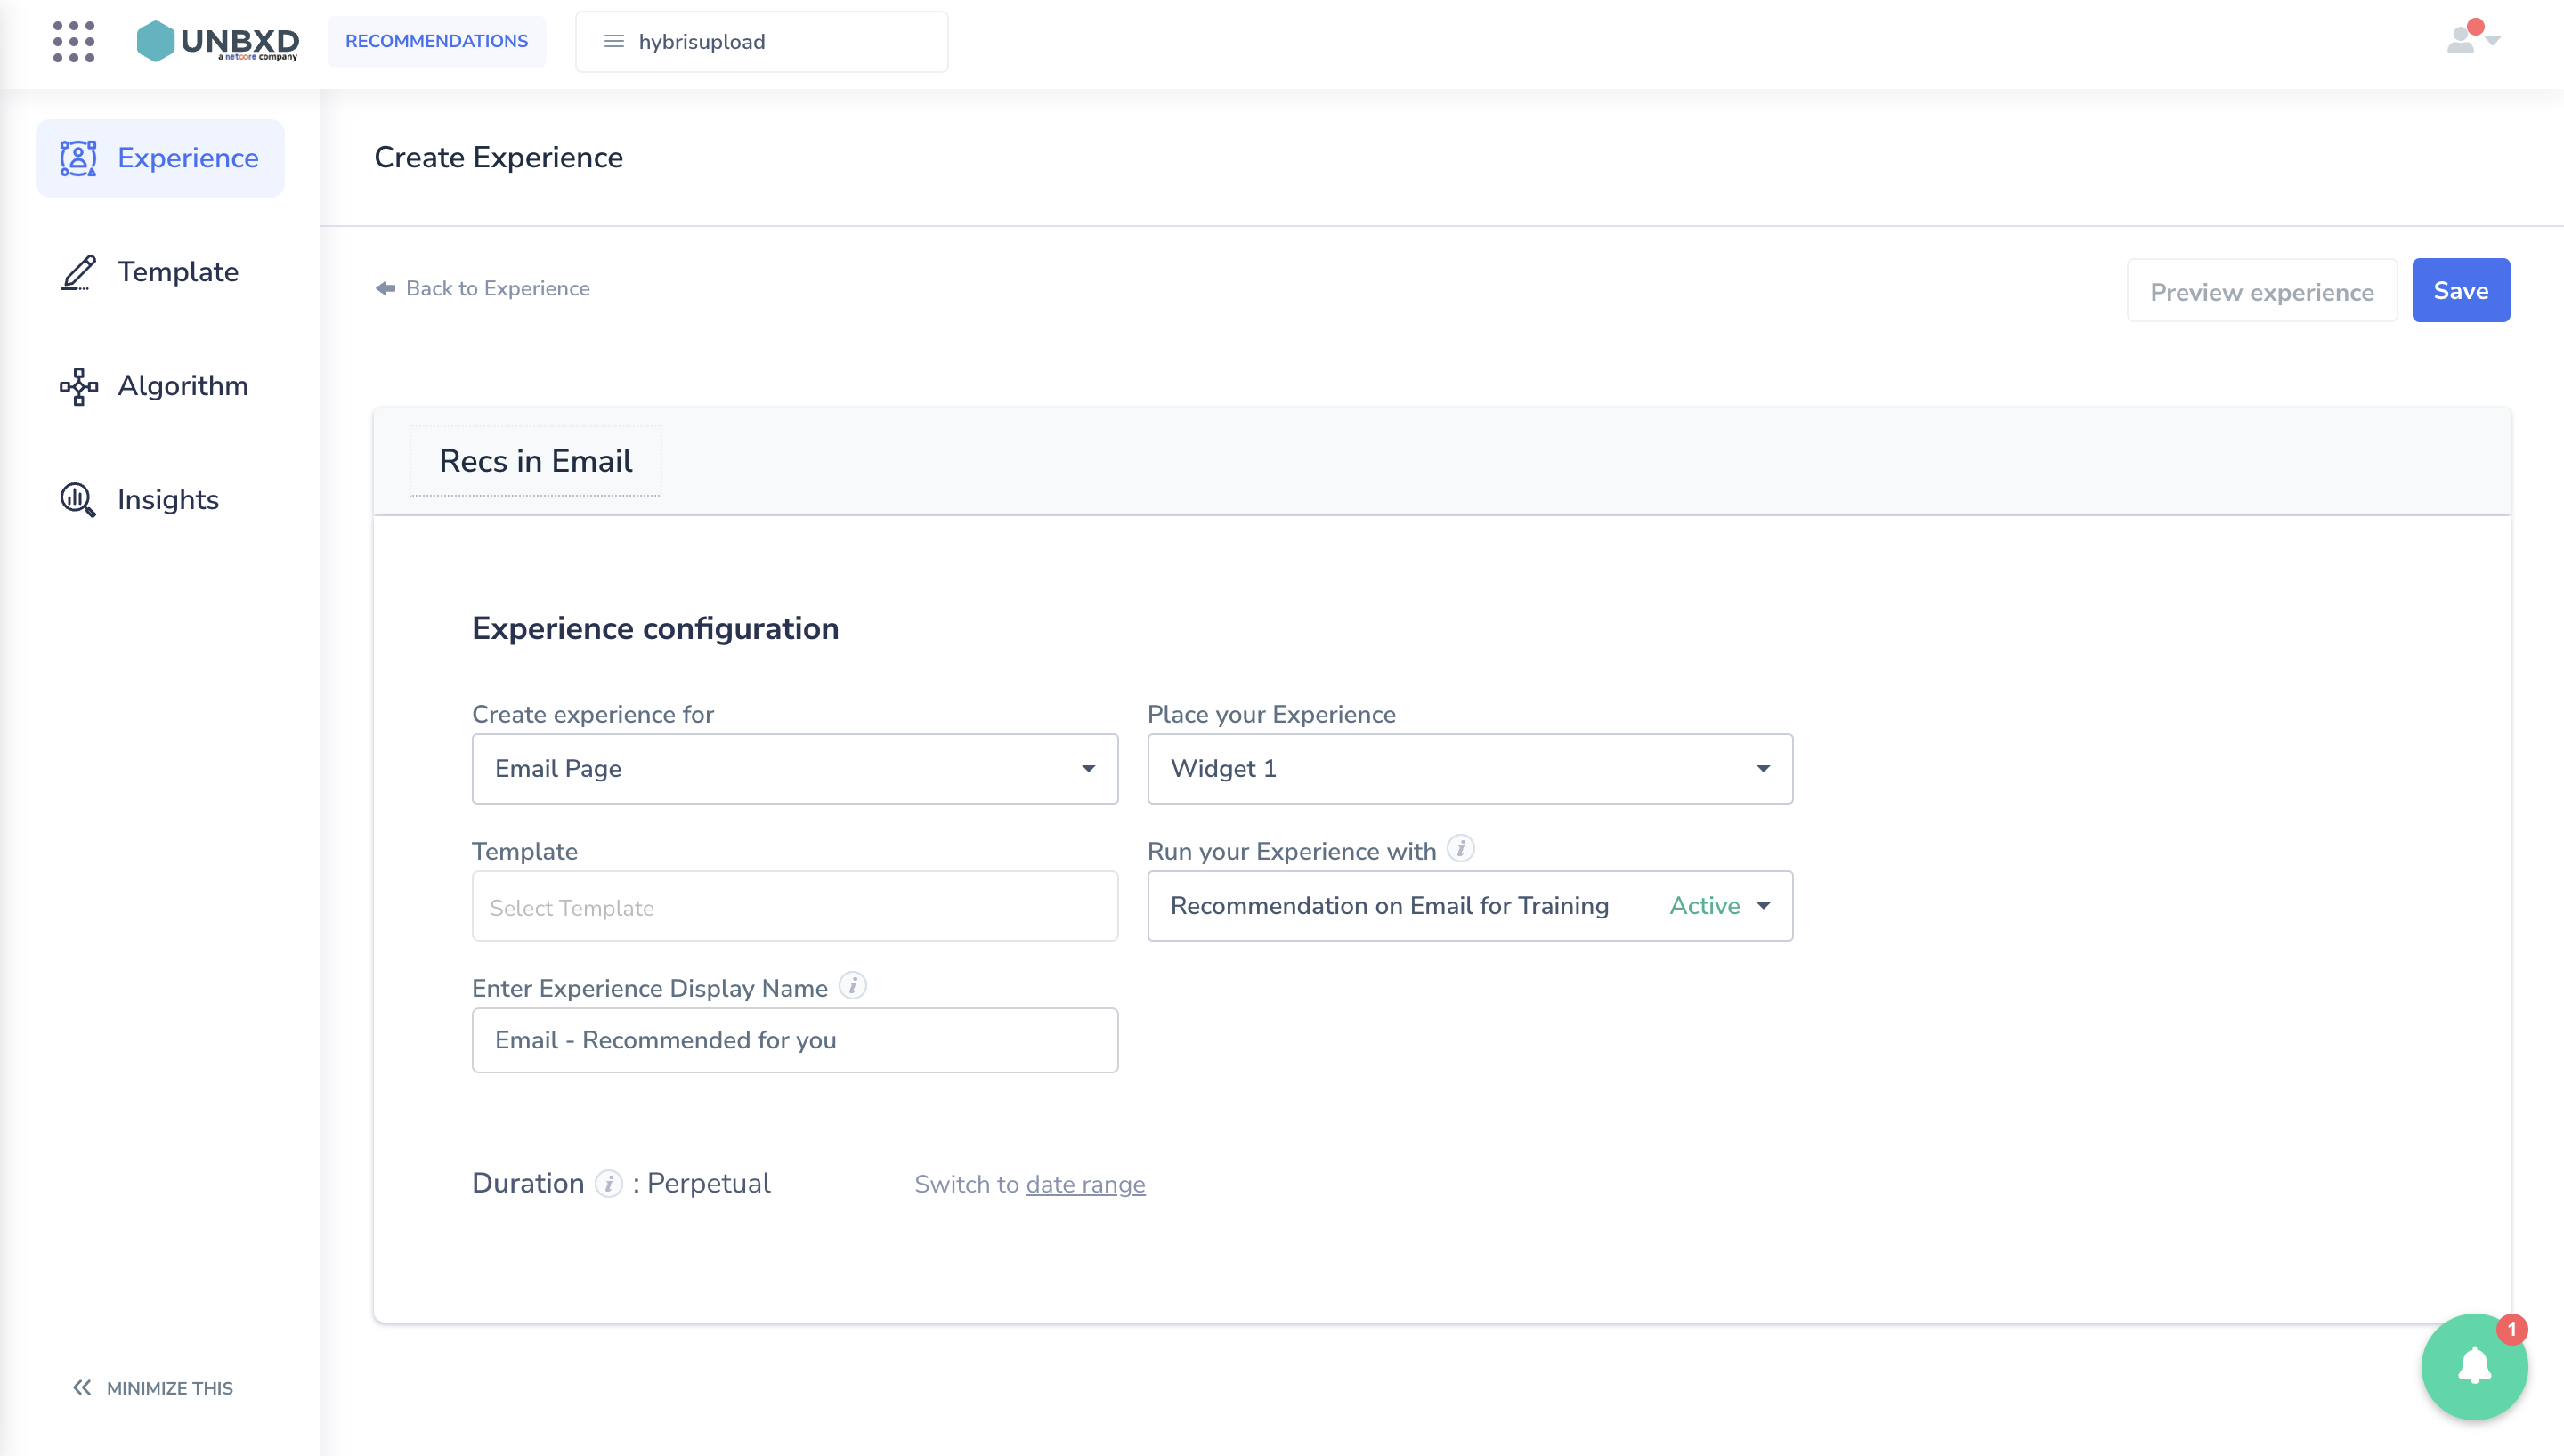
Create an Experience
-
Under "Create experience for" choose the "Email Page".
-
Select the Widget placement slot. Note at the moment, max 3 email widgets - essentially experiences, are possible. Either or a combination of the widgets can be used on any number of email templates.
-
Choose the Recommendation algorithm - This could be a core or custom algorithm but algorithms that take product/category level context, such as Bought also bought, Viewed also viewed, are not selectable for email at the moment.
-
Choose the Display name and duration.
-
Save the experience and you are set.
Creating your Recommendation template
-
Head on to the content creation section of Email.
-
Select Advanced Drag and Drop Editor
-
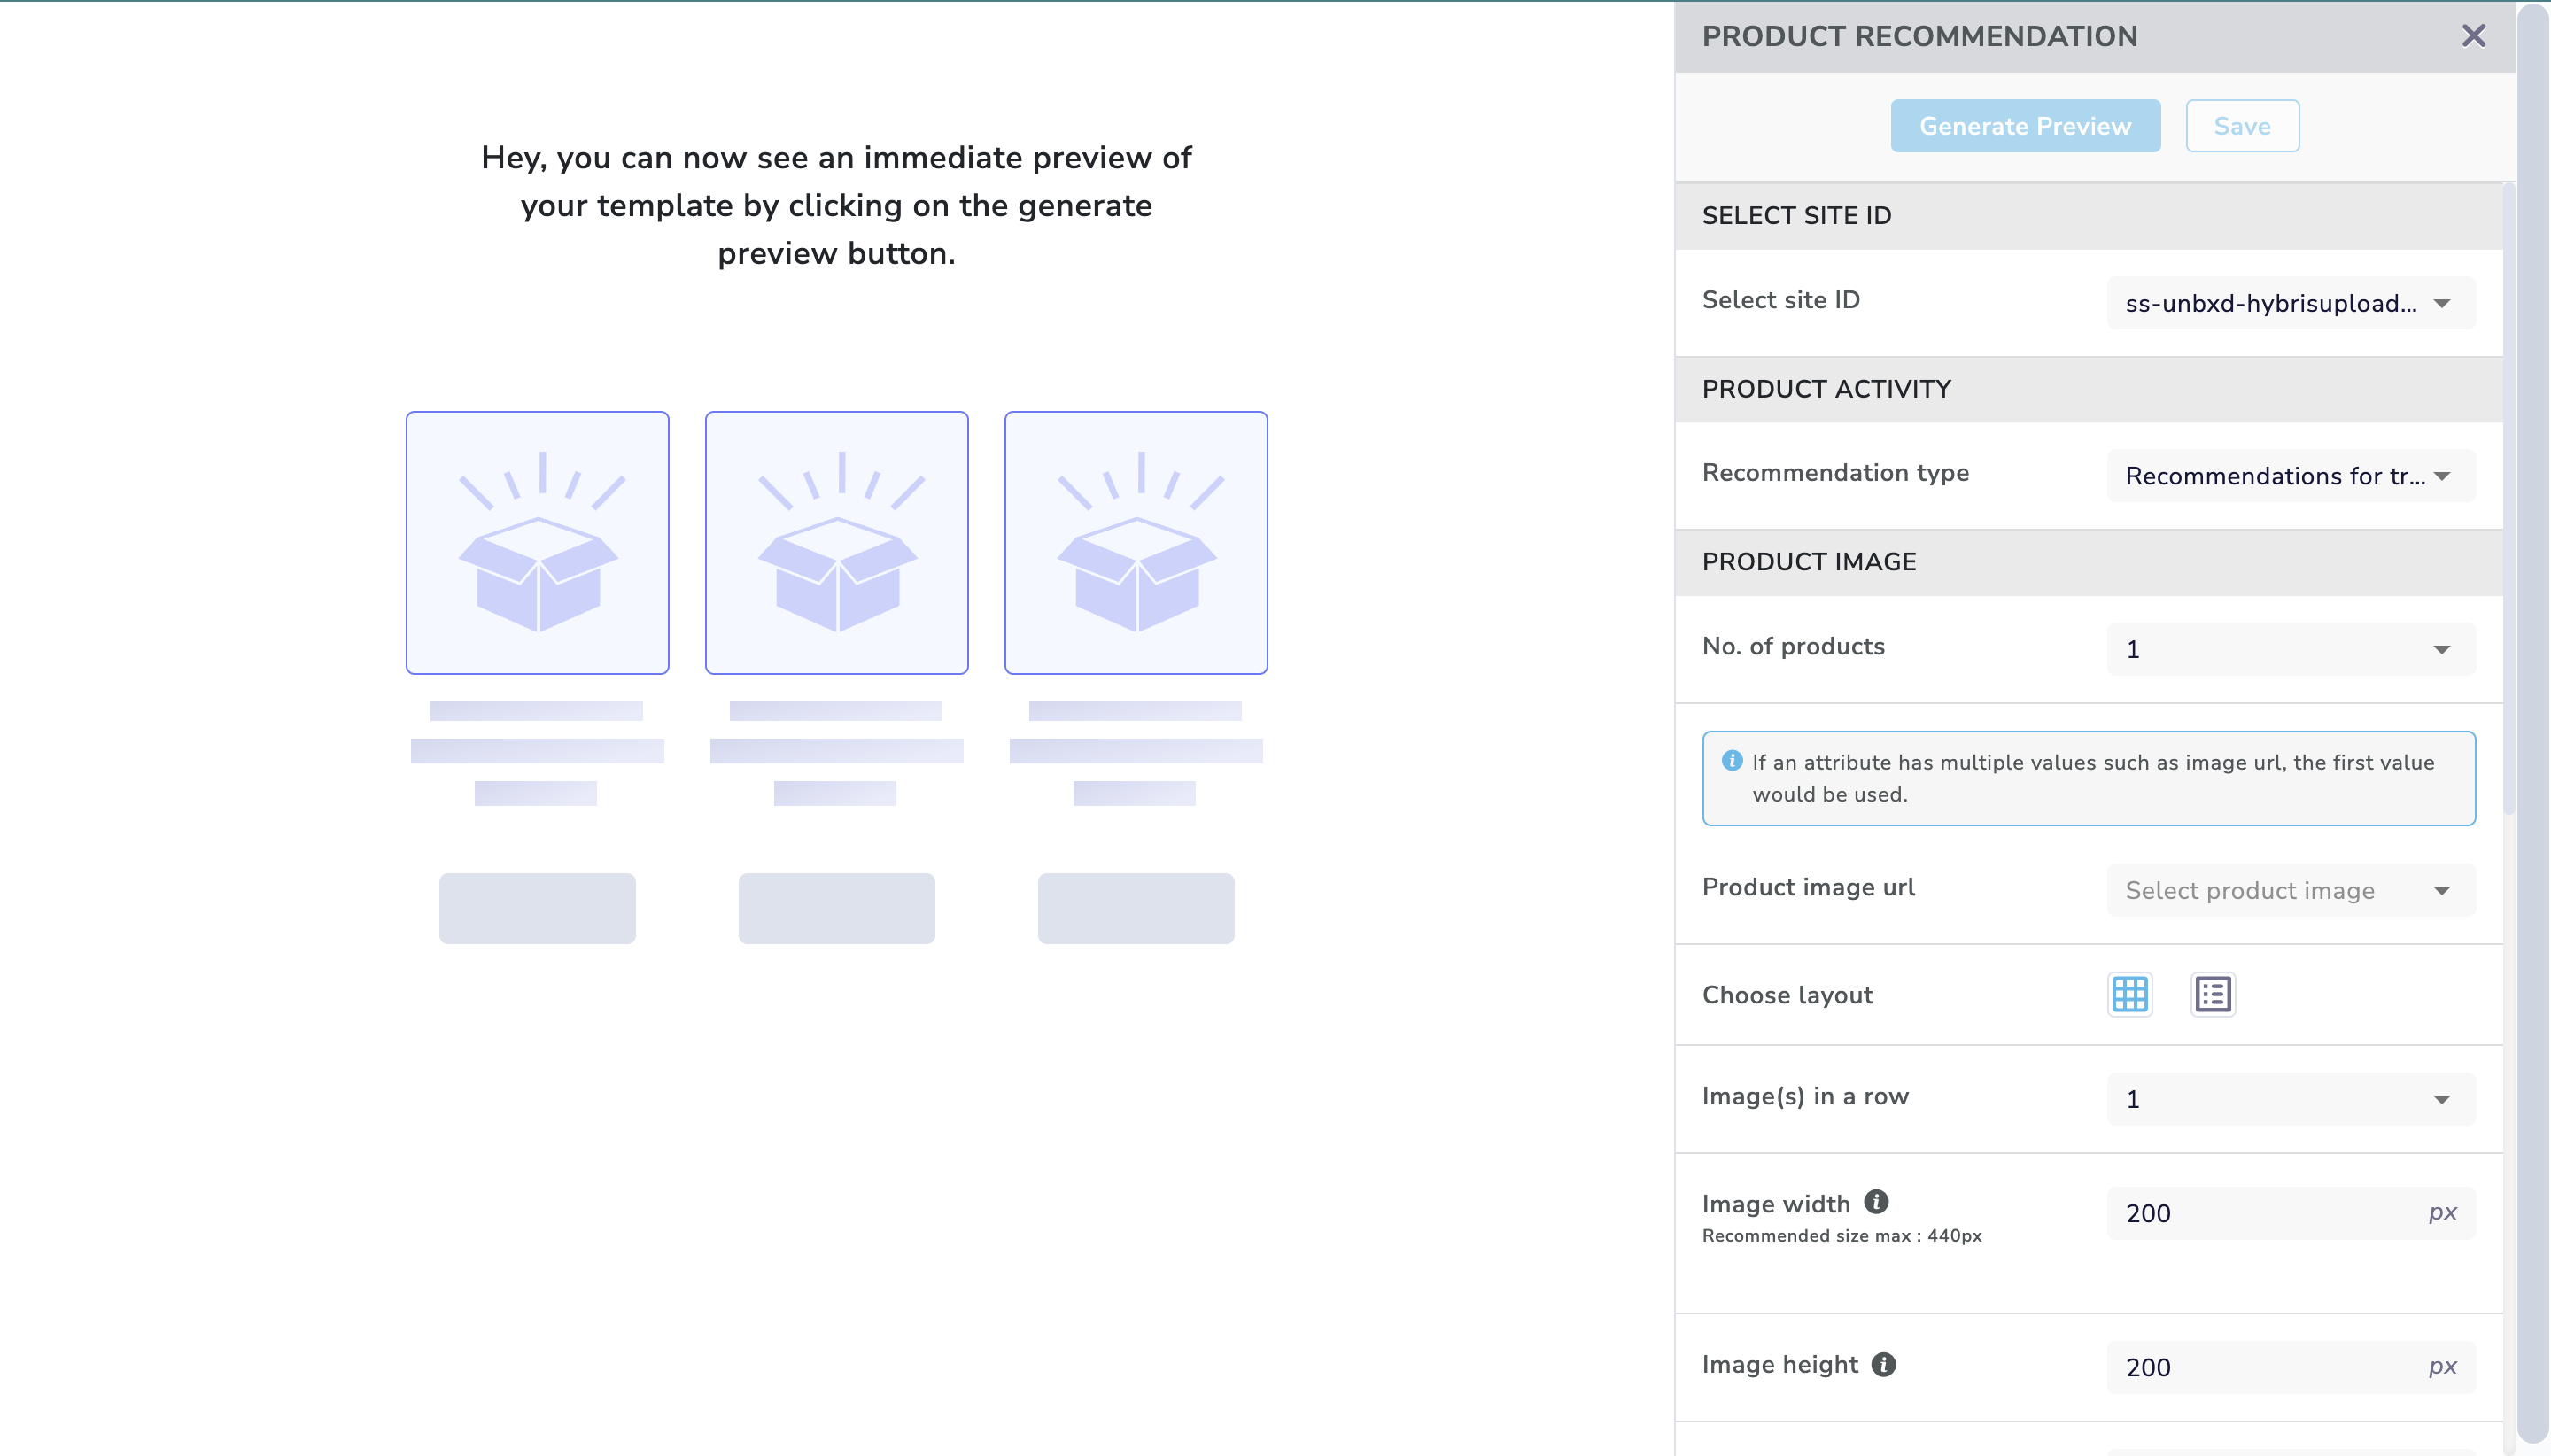
In the editor canvas, drag and drop the Product Recommendation block from the right menu.
-
Click on "Product Recommendation" to configure the view and elements of Product Recommendation items to be shown in the final email.
-
Select the relevant Unbxd Site ID
-
Select the type of recommendation you want to send to your customers - All Unbxd Recs experiences of the Email page type will be available here
-
Select the maximum number of products you want to show in the email.
-
Then using the recommendation widget select the Product image url/Field value for your Product Image.
-
You can also specify two Product properties in your products to be shown.
-
Specify the Button Text and the button URL to be shown in the template.
-
You can also select the button text colour and the button backgroung colour for your products.
-
Click on Save to see the preview of the items to be shown in the template.

- Once these are configured, the recommendation email will be ready to be sent from the configured node of Journey
- Journey creation process will be business as usual, the marketeer will need to select the respective product recommendation template in the email node.
- You can also use Product Collection along with Product Recommendation within the same email through Journey

Here is a sample view of your final email having product recommendation :

Updated 5 months ago