Email 2.0 (New)
Welcome to CEE Email 2.0, your new way to send Email communication to your valuable customers.
Introduction and Overiew
Before you get started with email campaigns the only requisite is to have your Domain Name added and verified on your CEE Panel. Check Domain Settings .
Once we are ready, we are good to go and create our first Email Campaign.
Email Broadcasts
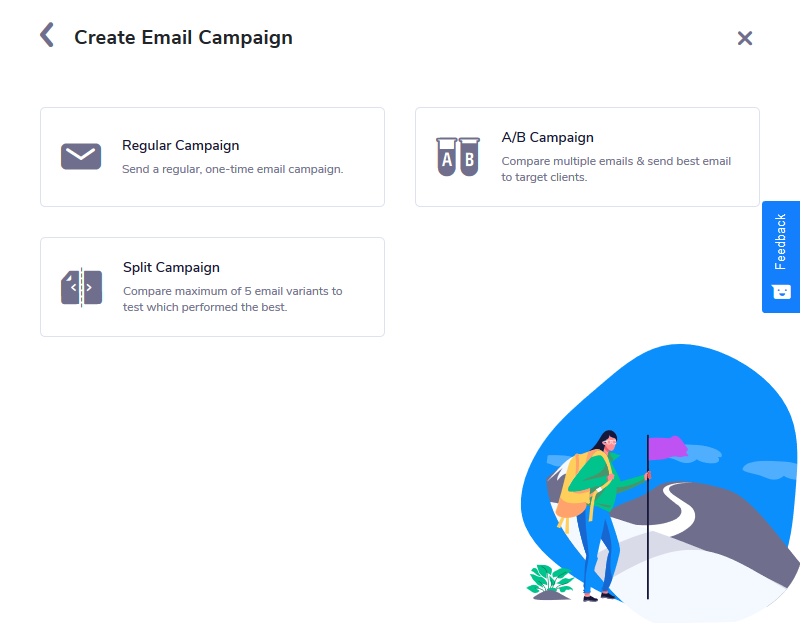
In CEE Email 2.0 (Beta), the following are the types of Email Campaigns that you can create and target your customers with :
-
Regular Broadcast : This is the most basic type of broadcast in which you either send text-based content or HTML based emails.
-
A-B Broadcast: You can design maximum up to 5 versions of the same broadcast, test it and determine the winner/better one (Based on Open/Click Rates) helping you to decide and send out the best one to the remaining contact base.
-
Split Broadcast : In a split campaign, you can compare a maximum of 5 email variants to test which one has performed the best.
Campaign Listing Page
The Campaign Listing Page shows all the campaigns that have been created by you along with their statuses, published date and the statistics for Published, Sent, Opened, Clicked, Unsub, Bounce, Conversions, Revenue numbers of the campaign.
The Campaign Listing Page also has the options to download Summary Reports where you can download the complete summary of all the campaigns and Custom Detailed Report in which you can specify the Activity and the Attribute details and send the report to your specific email ids.
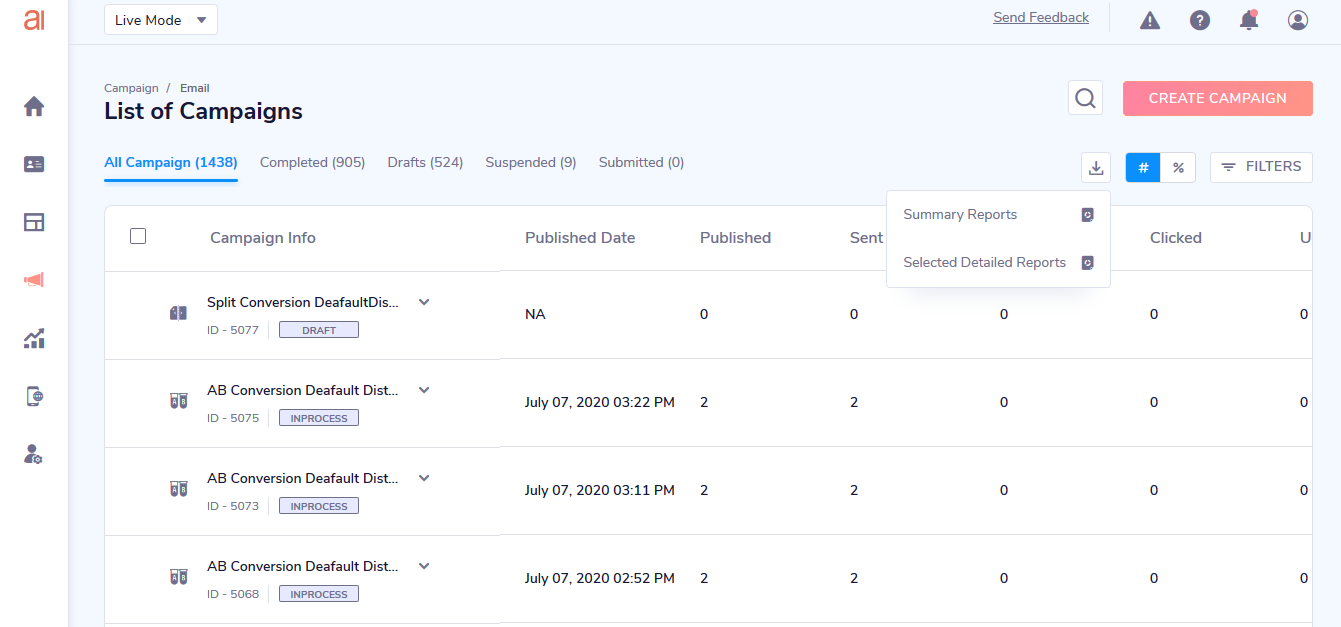
You can also filter the campaign based on Campaign Type, Data Range, Tags, Subject Line, Broadcast Name, Broadcast ID and Sender Email ID.
To search a campaign, one can use the search option to the campaign by Name or ID of the campaign.
Also, you can access the Campaigns based on their status by navigating through the various campaign status option which has the following status :
| Status of the Campaign | Description |
|---|---|
| Completed | The campaigns which have been sent to all the audience can be viewed under completed status. |
| Drafts | The campaigns which have been drafted but not yet published, you can go ahead and edit or copy such campaigns. |
| Suspended | The campaigns which have been suspended or declined because of reasons like Undefined Contacts, etc. |
| Submitted | The campaigns which are sent for publishing or are in the queue before they are published. |
How to Create a Email Broadcast ?
Creating a Regular Campaign
To create a new regular campaign, click on the "Create Campaign" button, and choose the Regular Campaign.
The Campaign Creation page will open which will conatin four basic steps of campaign creation and a summary column to provide you with an easy and quick view of your campaign. Lets discuss the various steps to create your first campaign :
1. Setup
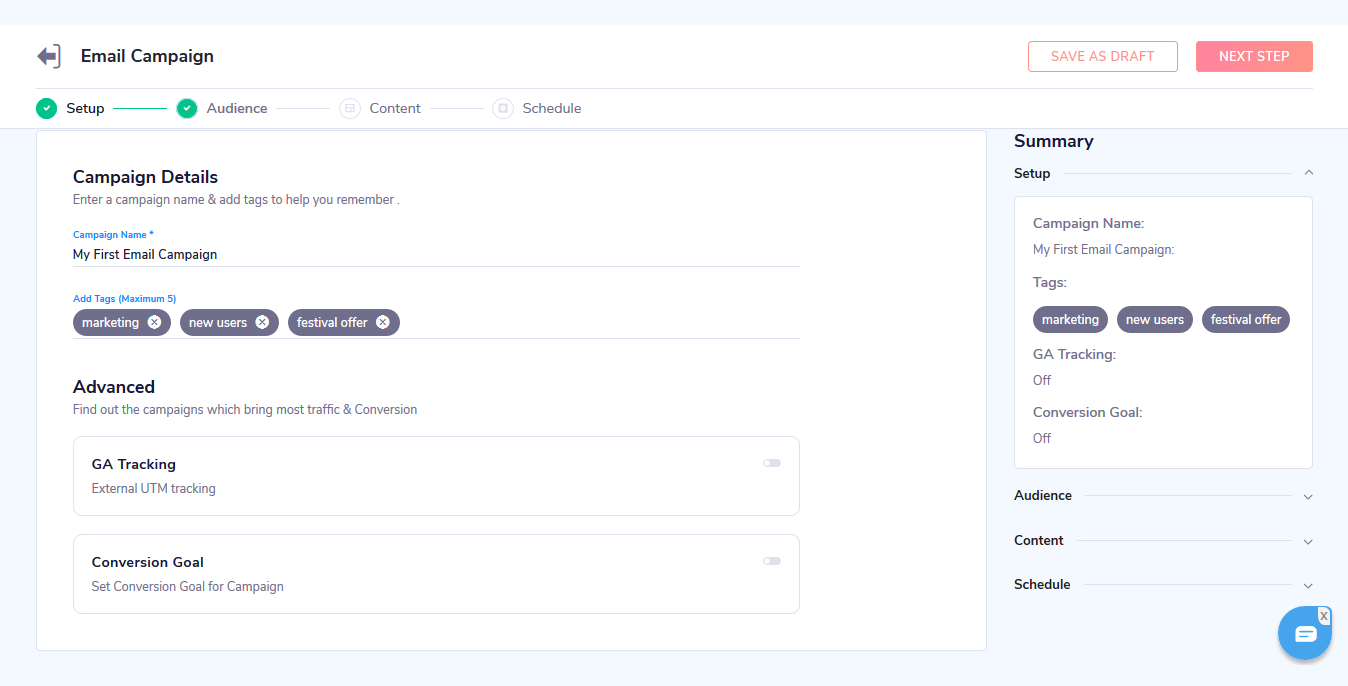
Setup page will let you put basic details of your campaign and some of the important setting :
a. Campaign Name: You can give a suitable name to your campaign, the same will appear in the campaign listing page.
b. Tags : Tags help to identify your campaign based on various context, it will help you search your campaigns easily. Add a suitable tag to your campaign. You can add maximum up to 5 tags. Also to create a new tag, you have to type in the tag and press Enter.
Advanced Setting
The settings for Google Analytics Tracking and Conversion Goal tracking helps you analyse the performance of your campaign.
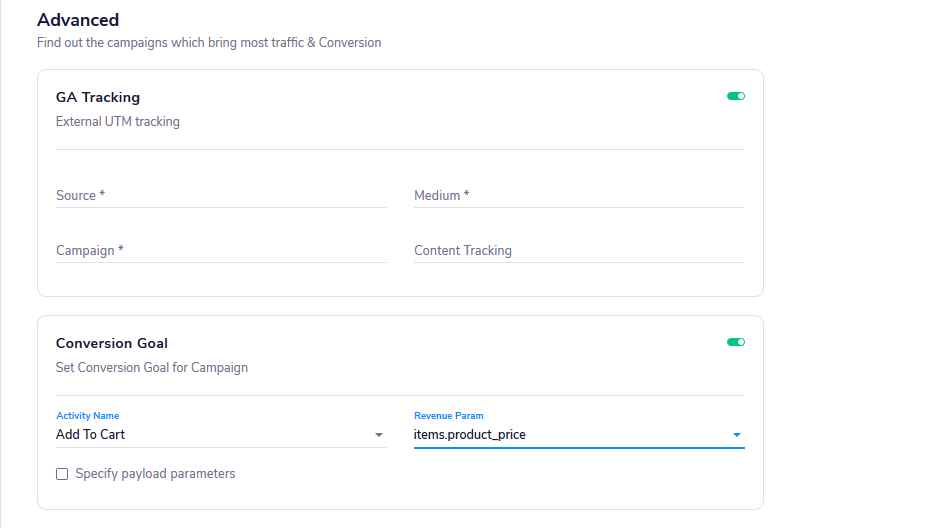
GA Tracking : This feature helps you identify the communication messages that attribute traffic to your website. Whenever a contact visits any web page by clicking a link in the message, you would be able to track it.
Hence, you can see exactly how much interest, traffic or revenue a campaign has generated. Enabling external tracking can give you better insights, and hence better control over attribution.
To track your links on your GA panel, add the source, medium, campaign and content tracking values.
Conversion Goal: You can set up your conversion activity and your revenue parameter to measure the effectiveness and conversion from a particular campaign. Eg : Add to Cart and product.price
You can also specify the parameters which need to match for a particular activity. Eg. product.category = TShirts
Conversion Tracking
Web/App Activity should be enabled for use the Conversion Tracking in campaigns.
Click on "Save As Draft" to save the campaign, and click on "Next Step" to proceed to Audience Selection.
2. Audience
The Audience selection step lets you select the target contacts for your campaign. You can add lists/segment and also specify to contacts to be excluded.
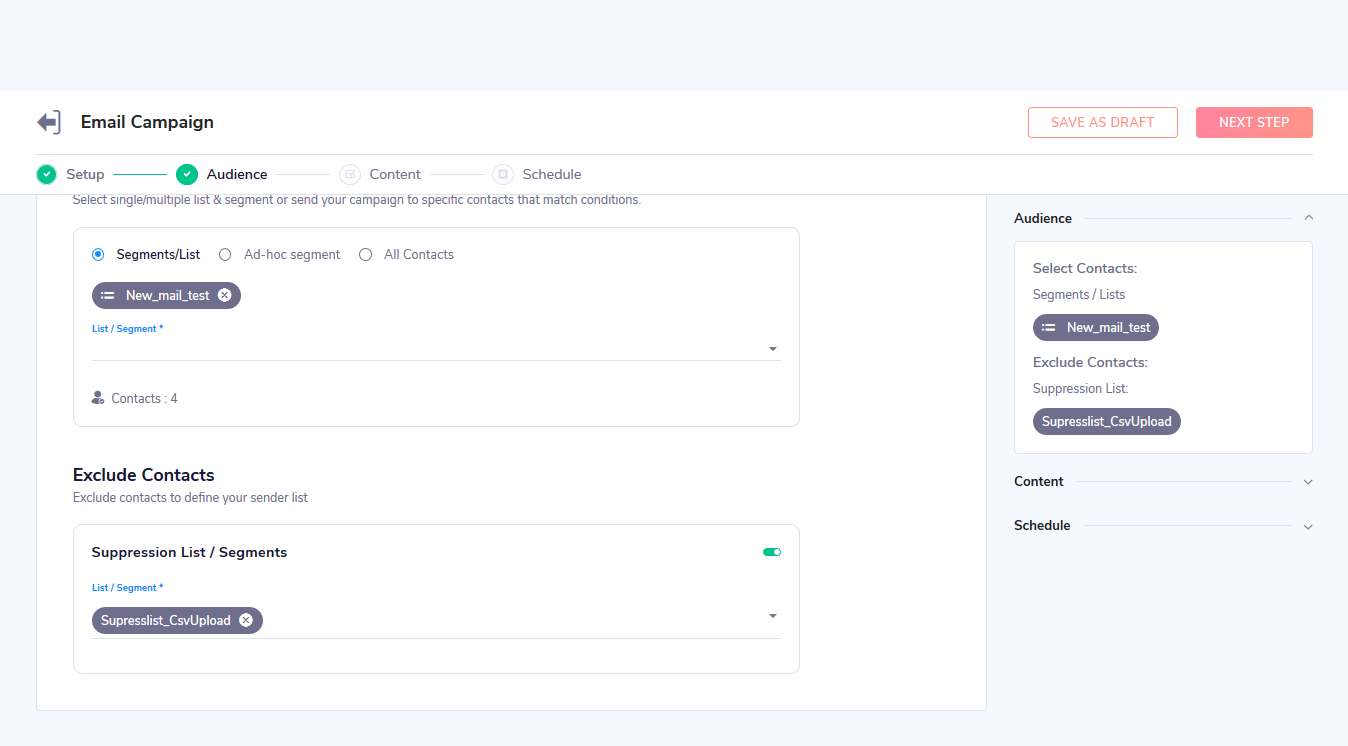
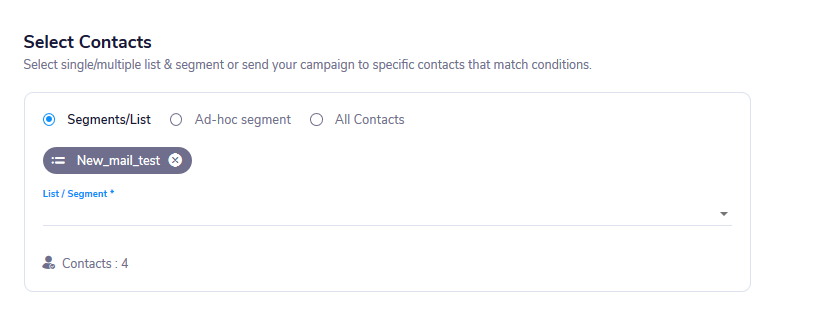
a. Segments/List : You can multiple pre-defined lists or segments as your target contacts. To add a segment/list just simply search the name and select the checkbox to add it.
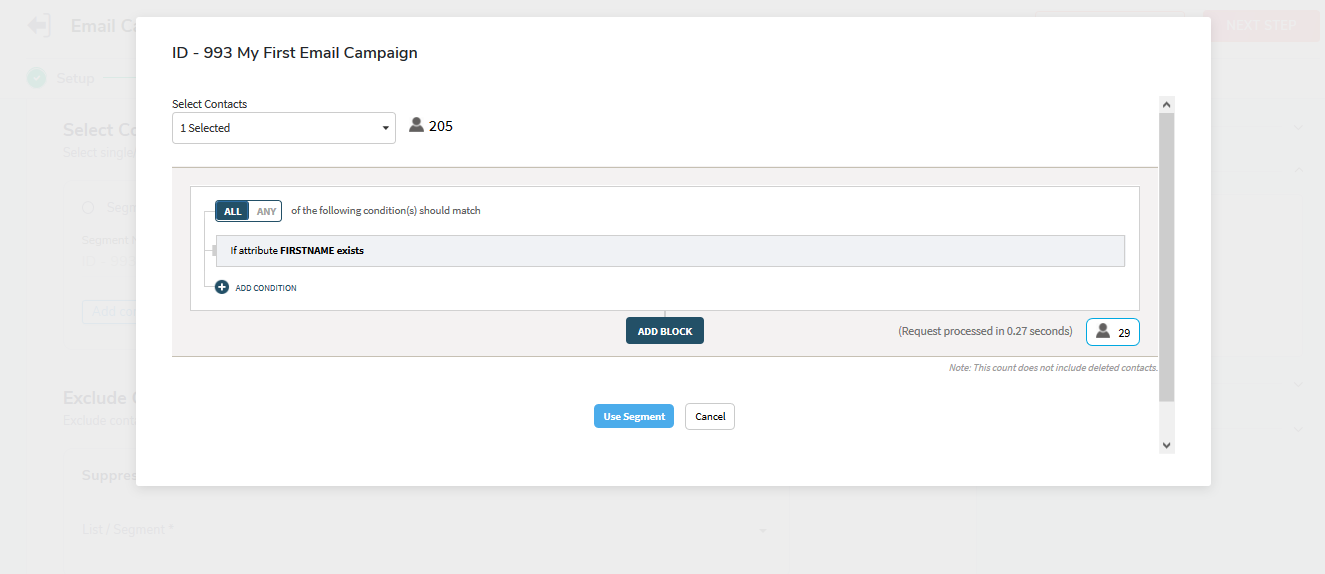
b. Ad-hoc Segment : Use this option to create on the fly segment for the particular campaign, You can set the condition for your segment, get the count for the users and use the segment in the campaign.
c. All Contacts : If you are creating a campaign to target all the users in your contact list, you can select the All Contacts option.
Exclude Contacts
To suppress a set of users and to not target them through the campaign you can select the suppression segments or lists. You can select maximum up to 5 segments or lists.
Click on "Next Step" to save and proceed to Content Section.
3. Content
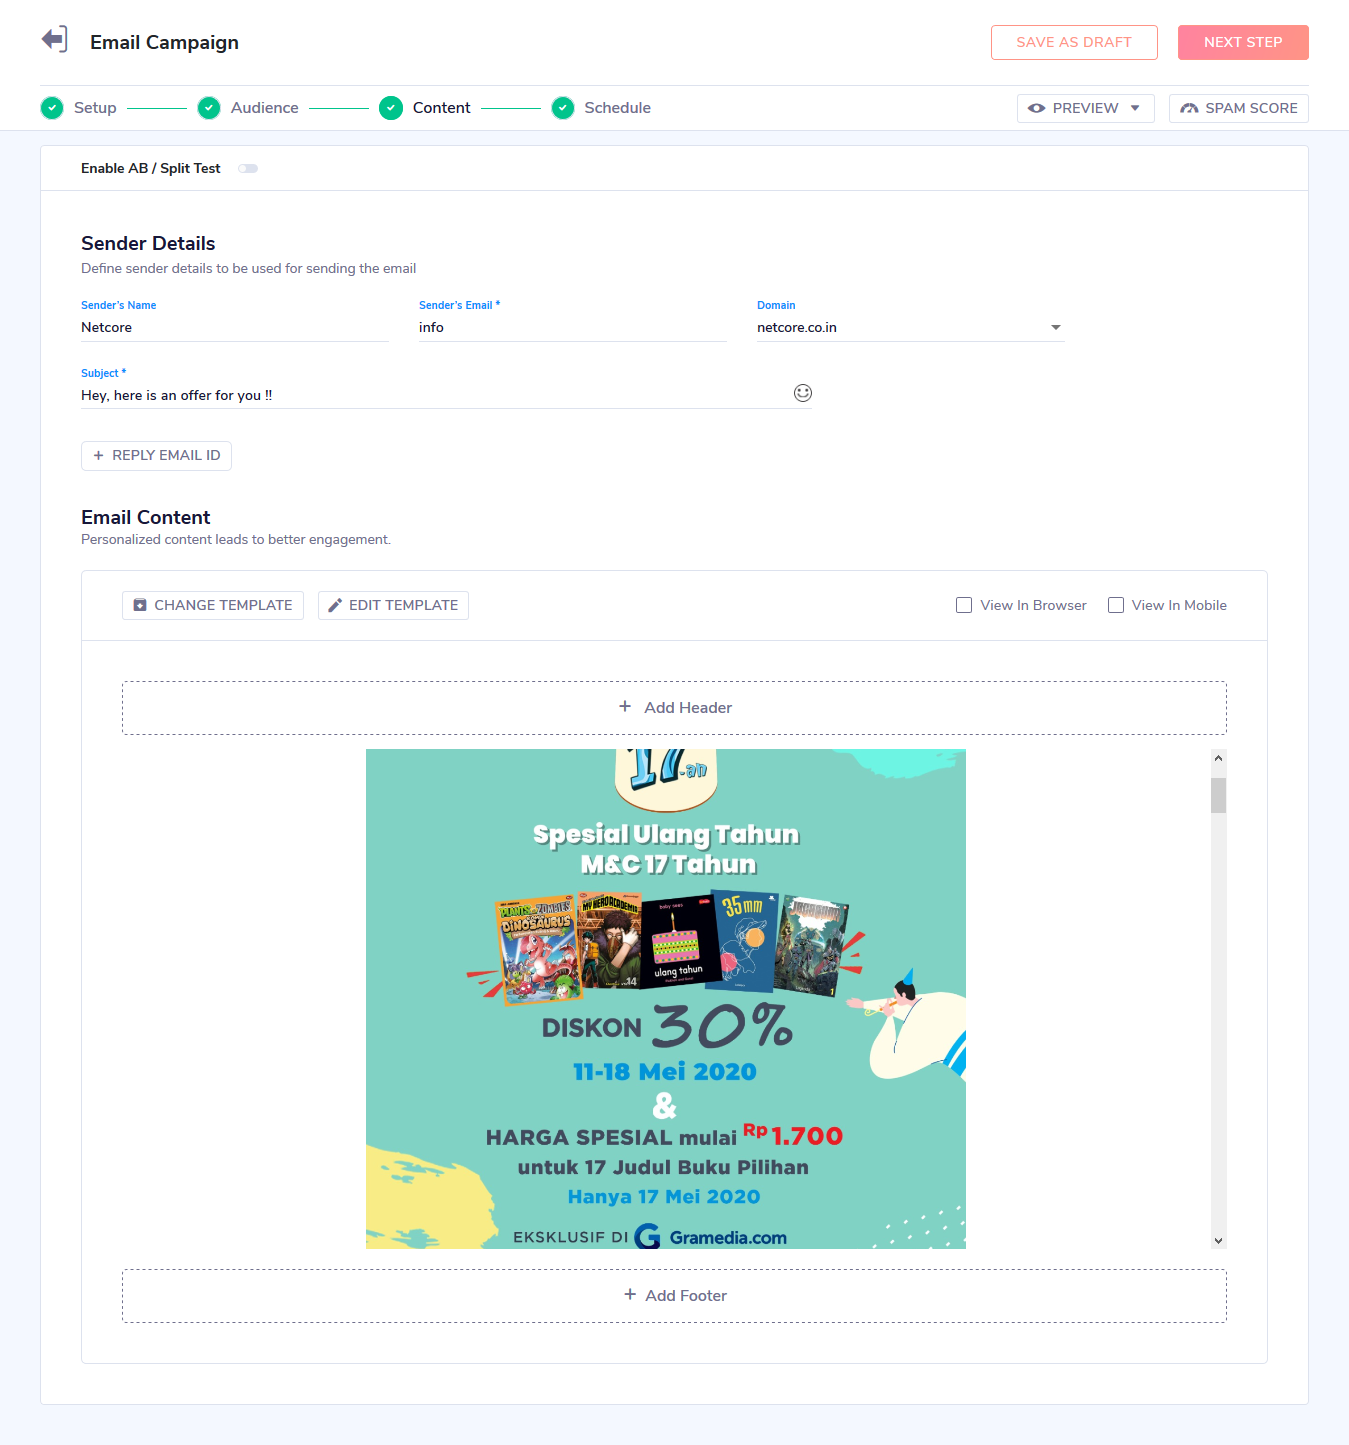
Once done with the campaign details and audience selection, here comes the most important part of your campaign, the content selection. Here you can define the sender details, reply email id, create or select your email template, preview the template and test the template as well.
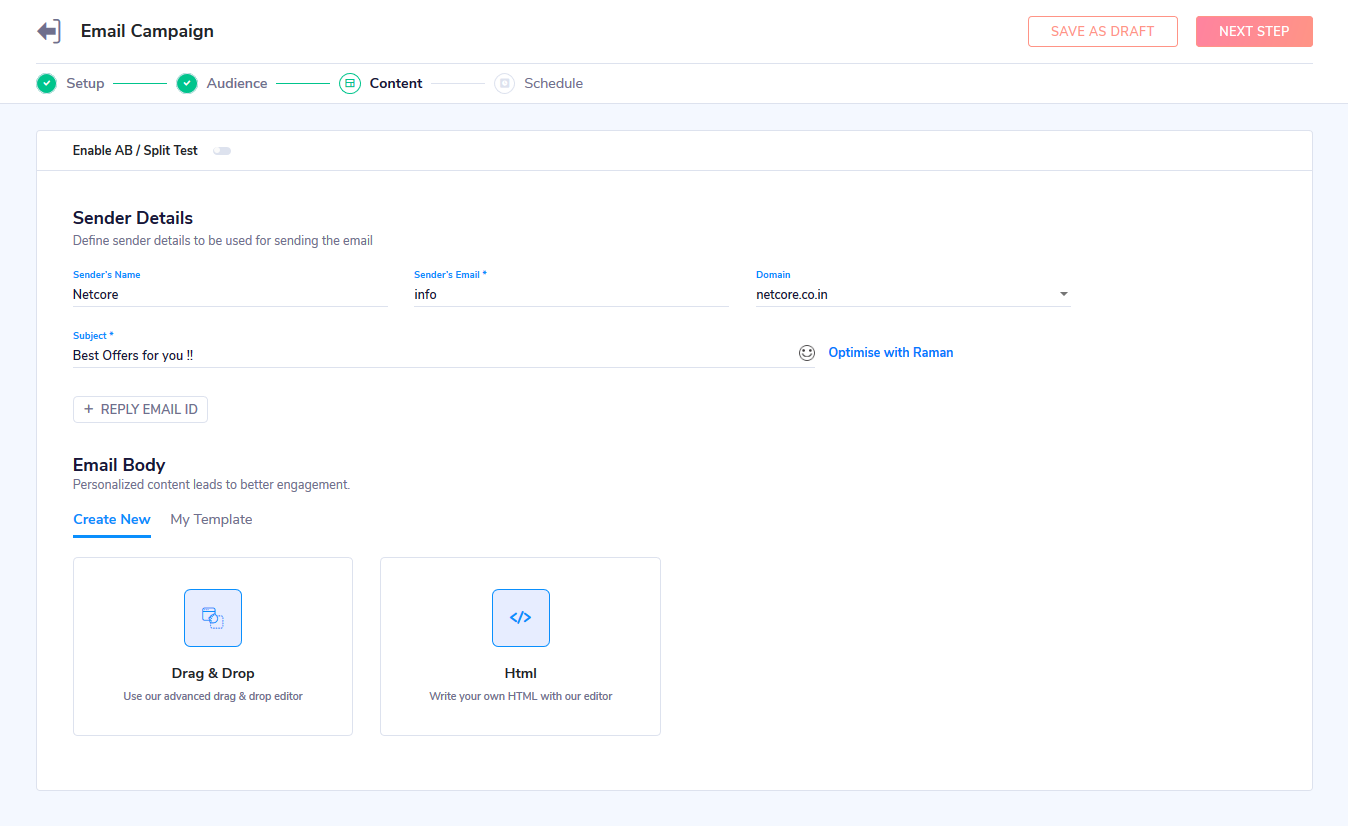
a. Sender's Name: This name appears in the 'From' column of the Contact's email inbox. Ex: If email is sent from [email protected], and Sender's Name is 'CEO of XX Company', for the contact, it is an email 'From' the 'CEO of XX Company'.
b. Sender's Email Address: The email address from which you want to send the broadcast. You need to add the domain in the Admin section >> Account Configuration >> Click on Edit corresponding to "Domain Name for Sending Emails"
c. Subject : Add a suitable and eye-catching Subject line to your email. You can also add emojis in your Subject line and can also personalise your subject line through Email Personalization .
d. Reply-To Email Address: is the ID to which the recipient can send replies. It is not the ID from which email is sent.
e. CC List: If the user wants to send a copy of the email to a certain set of users then such users can be added to CC List. Such users will get a copy of the email.
Points to be noted:
- The users to who campaign has been sent won't be able to see the users who are added to the CC list
- The users who are added to the CC list needs to be part of the audience/contact master
- The CC list can be enabled from the Admin/Profile >> Account configuration >> Email Broadcast CC List >> Active
- The users in the CC list can be added/edited post enabling using Add/Edit option, maximum up to 10 users
Email Templates :
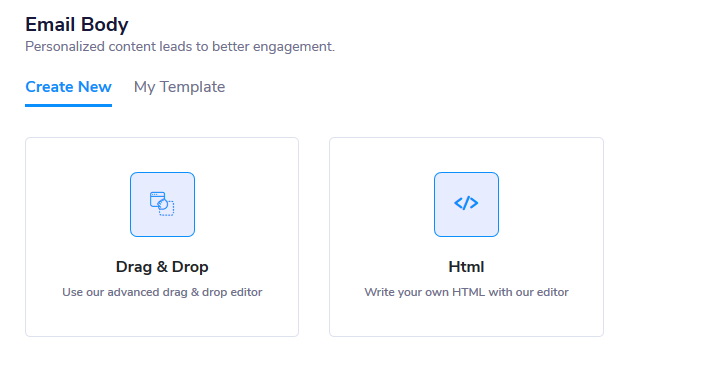
You can either create Email Templates or Select from an existing list of templates.
To create an email template you can use the Drag and Drop editor or the HTML Code Editor.
Header and Footer
You can add custom header and footer to your email templates and you can add to pre-defined headers :
View in Browser: This allows to load your email in a browser tab separately in cases your content does not load in the email app or web app.
View in Mobile : This allows the user to load their email in mobile view in a separate tab of your browser.
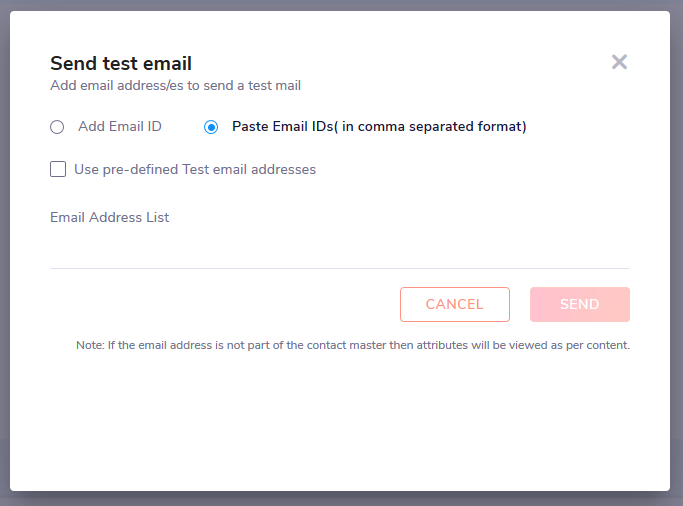
Preview and Test Mode : Once you have selected a template for your campaign, you can preview your template in three device mode Desktop, Tablet, Mobile.
You can also send test emails to your selected email to check how your email will look like in your inbox.
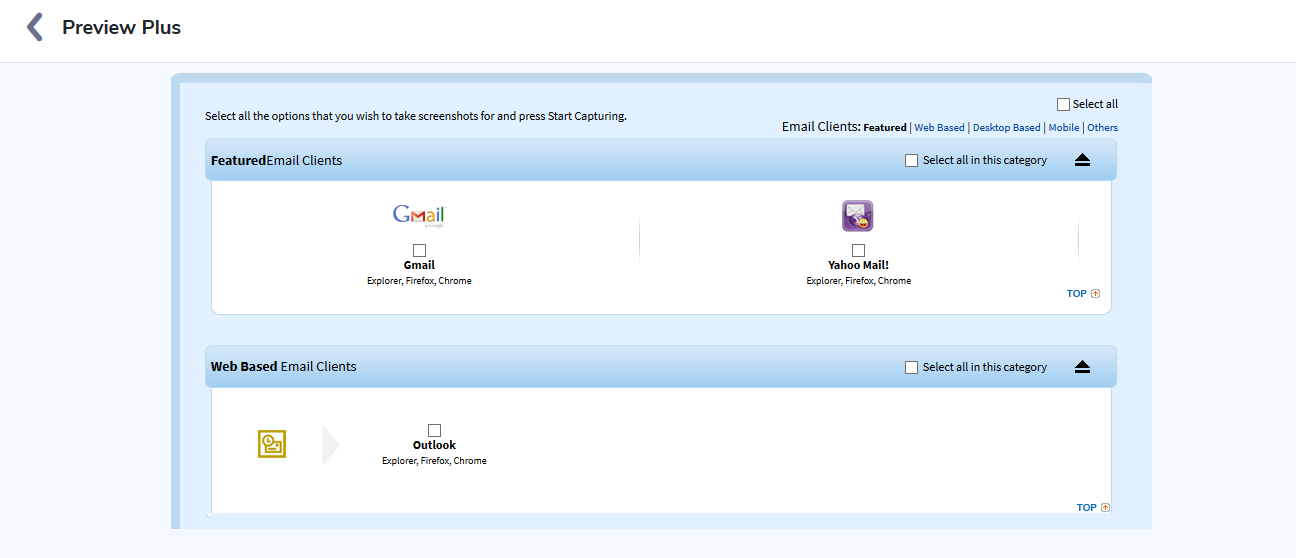
Preview Plus
This feature helps you in capturing the screenshot of your email template in different email clients, different devices and browsers in an automated manner.
Click on "Next Step" to save and proceed to Schedule Section.
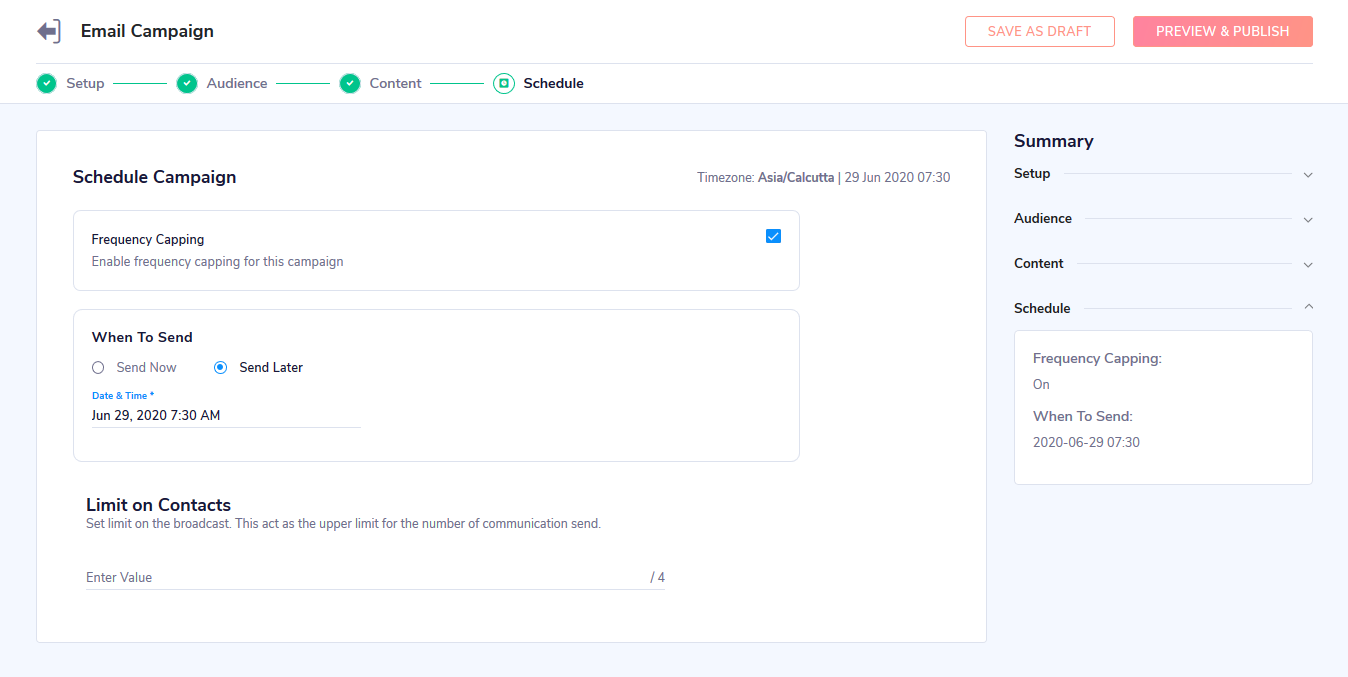
4. Schedule
The schedule section has the following options to set the final selection before publishing the campaign :
a. Frequency Capping : By applying the defined number of communication that a user can receive for email, you can restrict the number of communications. To know about setting up frequency capping check here Frequency Capping .
b. Send Now : It will send the campaign as soon as you publish it.
c. Send later: If you just do everything to create the broadcast, but do not want to send it now, you can schedule the date and time at which the broadcast should go.
d. Limit on contacts : You can select a maximum number of contacts the campaign should be sent out of the total contacts using the Limit of contacts.
Preview and Publish a Campaign
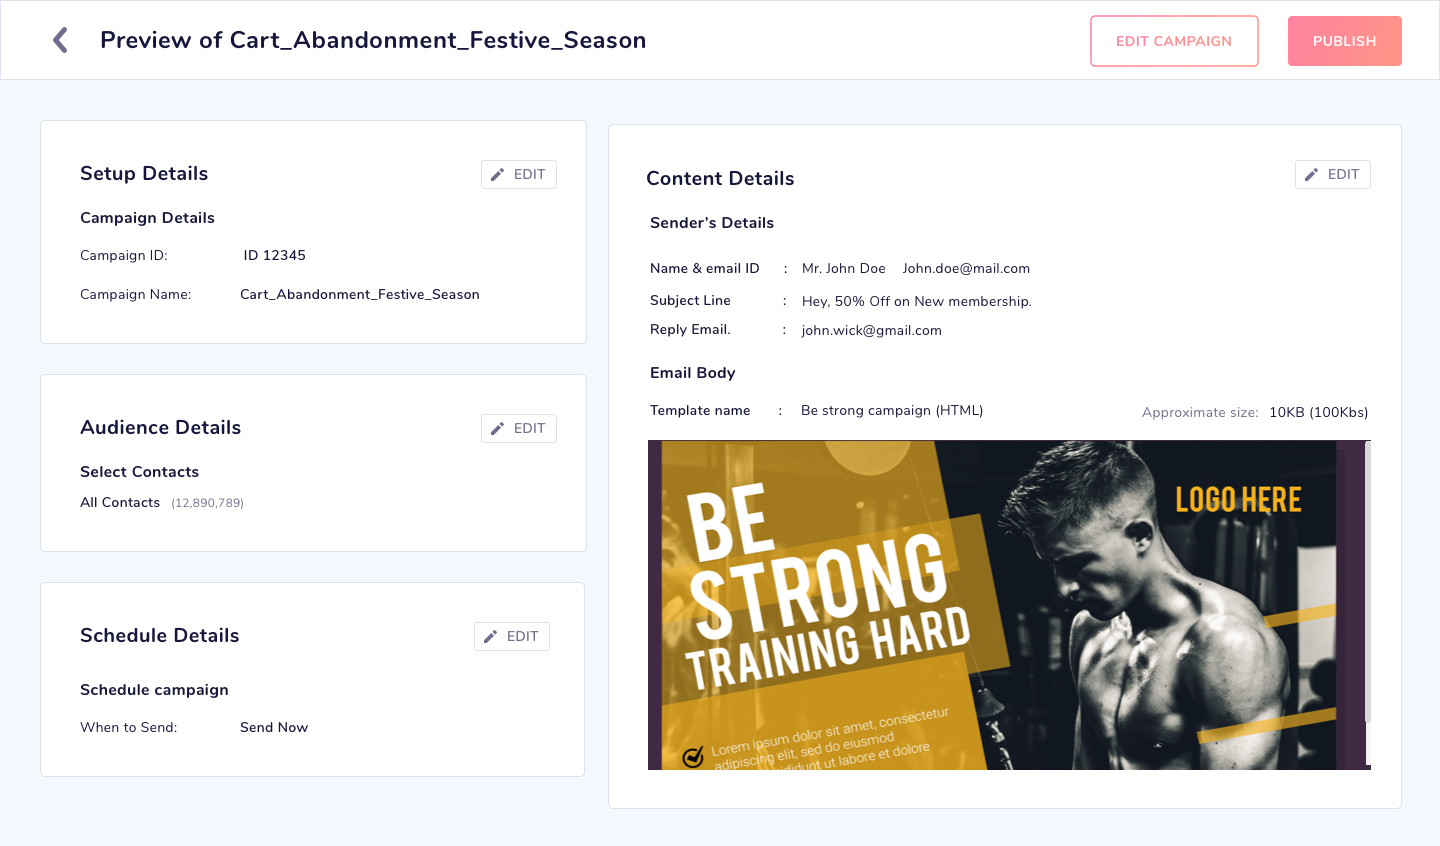
On the final page of email campaign creation, you can view the overall view of the campaign, also you can directly click on "Edit" and go to the particular section to edit that particular section.
Finally, we go ahead and publish the campaign. It will check for various setting points of your campaign and prompt you with the final confirmation before publishing the campaign.
Demo video to help you get started with Email 2.0
Updated 5 months ago
