
In-App message
Overview
To engage your active users for better conversions, In-App message is a good channel to connect with such active users and show them specific and relevant content via In-App messages.
Important note:
- In order to create In-app message campaigns, you should have the Netcore SDK integrated in your apps.
- In-app campaigns created in older UI In-app 1.0 can be edited or cloned only till 15th May 2024, post that this option would be disabled.
Please follow this link for integration details of Netcore SDKs.
If it is already integrated, let's get started.
- Login to your Netcore CEE panel and go to "Engage -> On-site - > In-app message".
- Here, you will see a list of campaigns created for in-app messages.
- You can click on "Create" button (top right in header section) to create a new In-App message.
Setup
In the Setup section, you can add the following details:
- Campaign Name - Give a suitable name for the campaign
- App Selection - You can select from the list of apps added in the asset section. You can select any specific apps that are configured on your panel.
- Tags - You can add tags to your campaigns which can help you to group or uniquely identify campaigns.
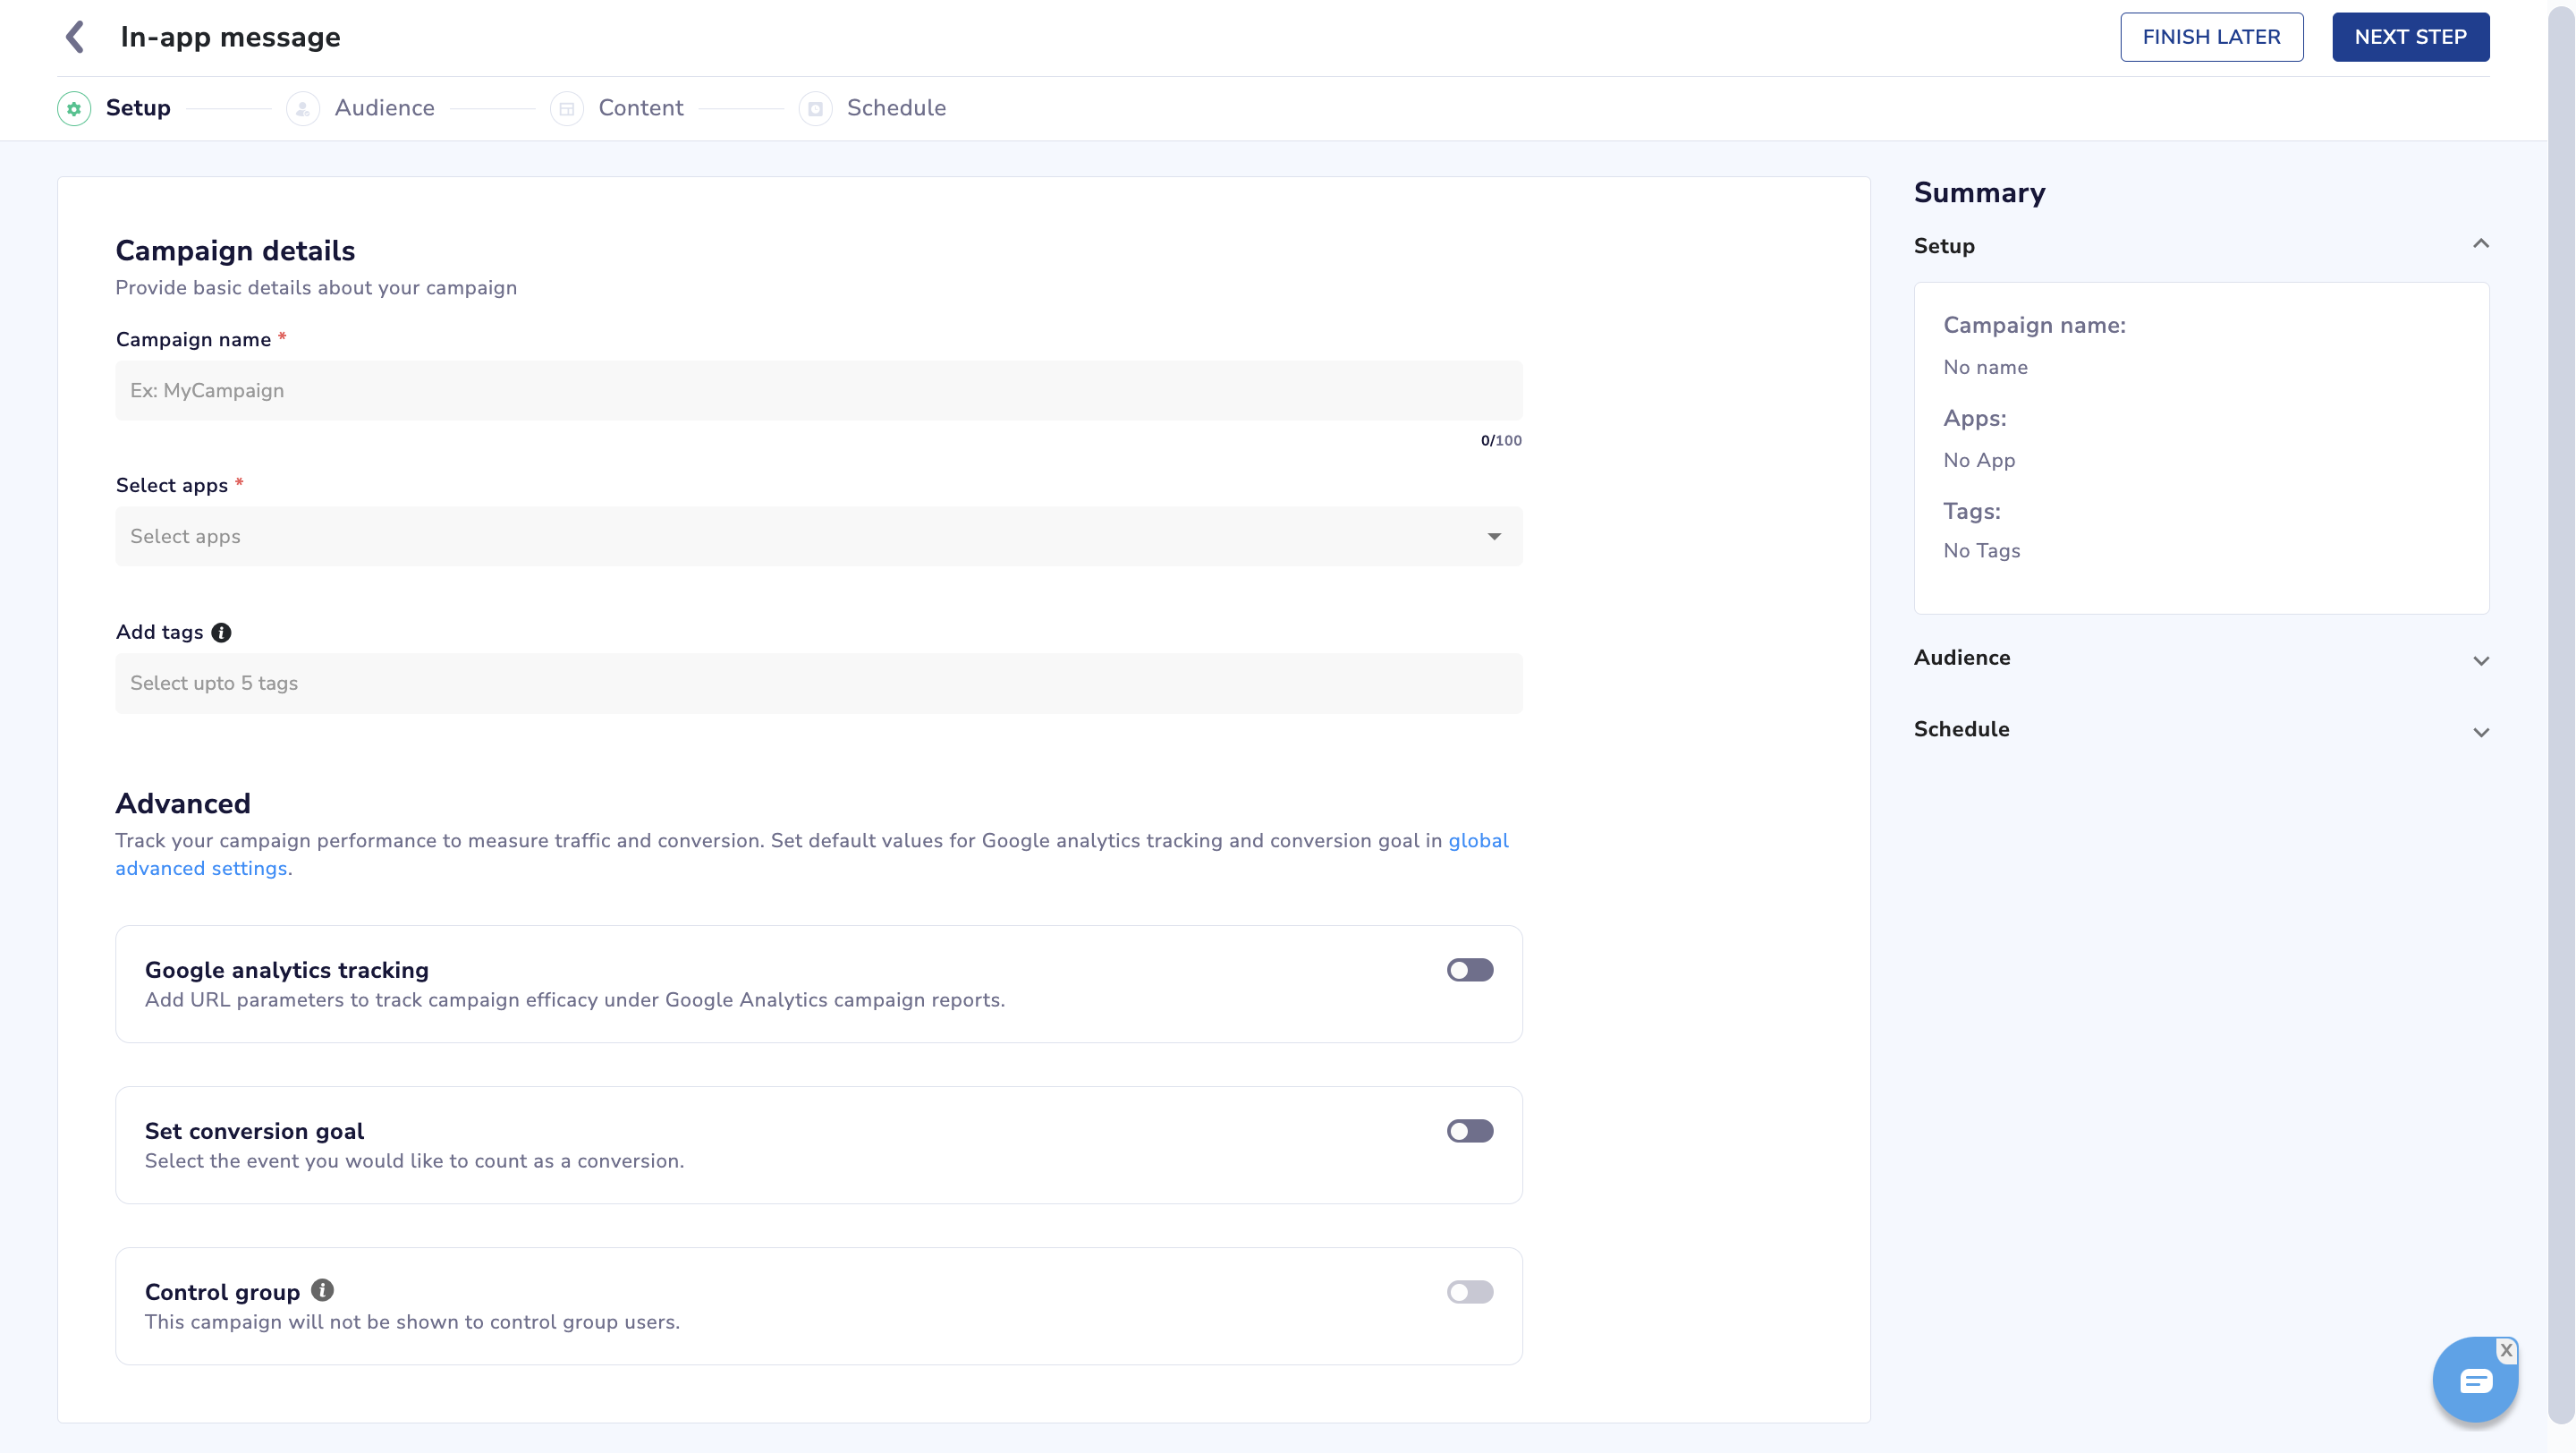
Advanced
You can set conversion goals here: Setting clear and measurable conversion goals helps businesses track their success in terms of generating revenue or increasing engagement and tracking if the user is doing the desired actions.

- Google Analytics Tracking
- UTM Source, UTM Medium, UTM Campaign - Once enabled, these utm parameters will get appended in the deeplink/URL added in content section for text only & image only templates. Additionally these utm parameters can be input as custom payload on click in in-app message.
- UTM Content: It is an optional field with the same functionality as above
Important
- For using GA tracking events in your campaign, ensure that you are using Netcore Android SDK v3.5.0 and Netcore iOS SDK v3.5.0 onwards
- Please note that Netcore offers only {CHANNEL} as personalized value in utm_medium and {CAMPAIGN_NAME} in utm_campaign as standard values
- For other utm_source, utm_content - personalized values are not supported. Even if one adds {SOURCE} manually in global advanced settings - it is treated as string and copied as is as the default value. It won’t personalize value of utm_source
- Character validation for values of utm fields: Only a-z A-Z 0-9 - _ . @ : ' / { } characters are allowed
- UTM values will be auto-populated once enabled based on settings done in global advanced settings of utm parameters
- Example: If url for redirection is https://domain.com/collections/payday with values of utm_source = Smartech, utm_medium = {CHANNEL} (in this case in-app), utm_campaign={CAMPAIGN_NAME} and utm_content is blank then final url should look like https://domain.com/collections/payday?utm_source=Smartech&utm_medium=in-app&utm_campaign=25Jan_TRIWellSale
- Set conversion goal
- Event - select an event that you consider as a conversion for this campaign. E.g. Product Purchase
- Specify payload parameters - You can also specify certain criteria for payload of the conversion event. E.g. Purchase event where product price is greater than 10,000. Up to 5 parameters can be added.
- Control group - You can specify the control group percentage here to see the uplift your campaign is going to give as compared to the control group. The selected percent of users will not receive the in-app message but we will track the conversion for them as well. Please note that it is mandatory to set conversion goal to use the control group feature.
Click on 'Next Step' button to go to the Audience section. You can click on 'Finish later' button to save the campaign as draft.
Audience
In this step, you need to specify the trigger conditions and audience criteria for your campaign.
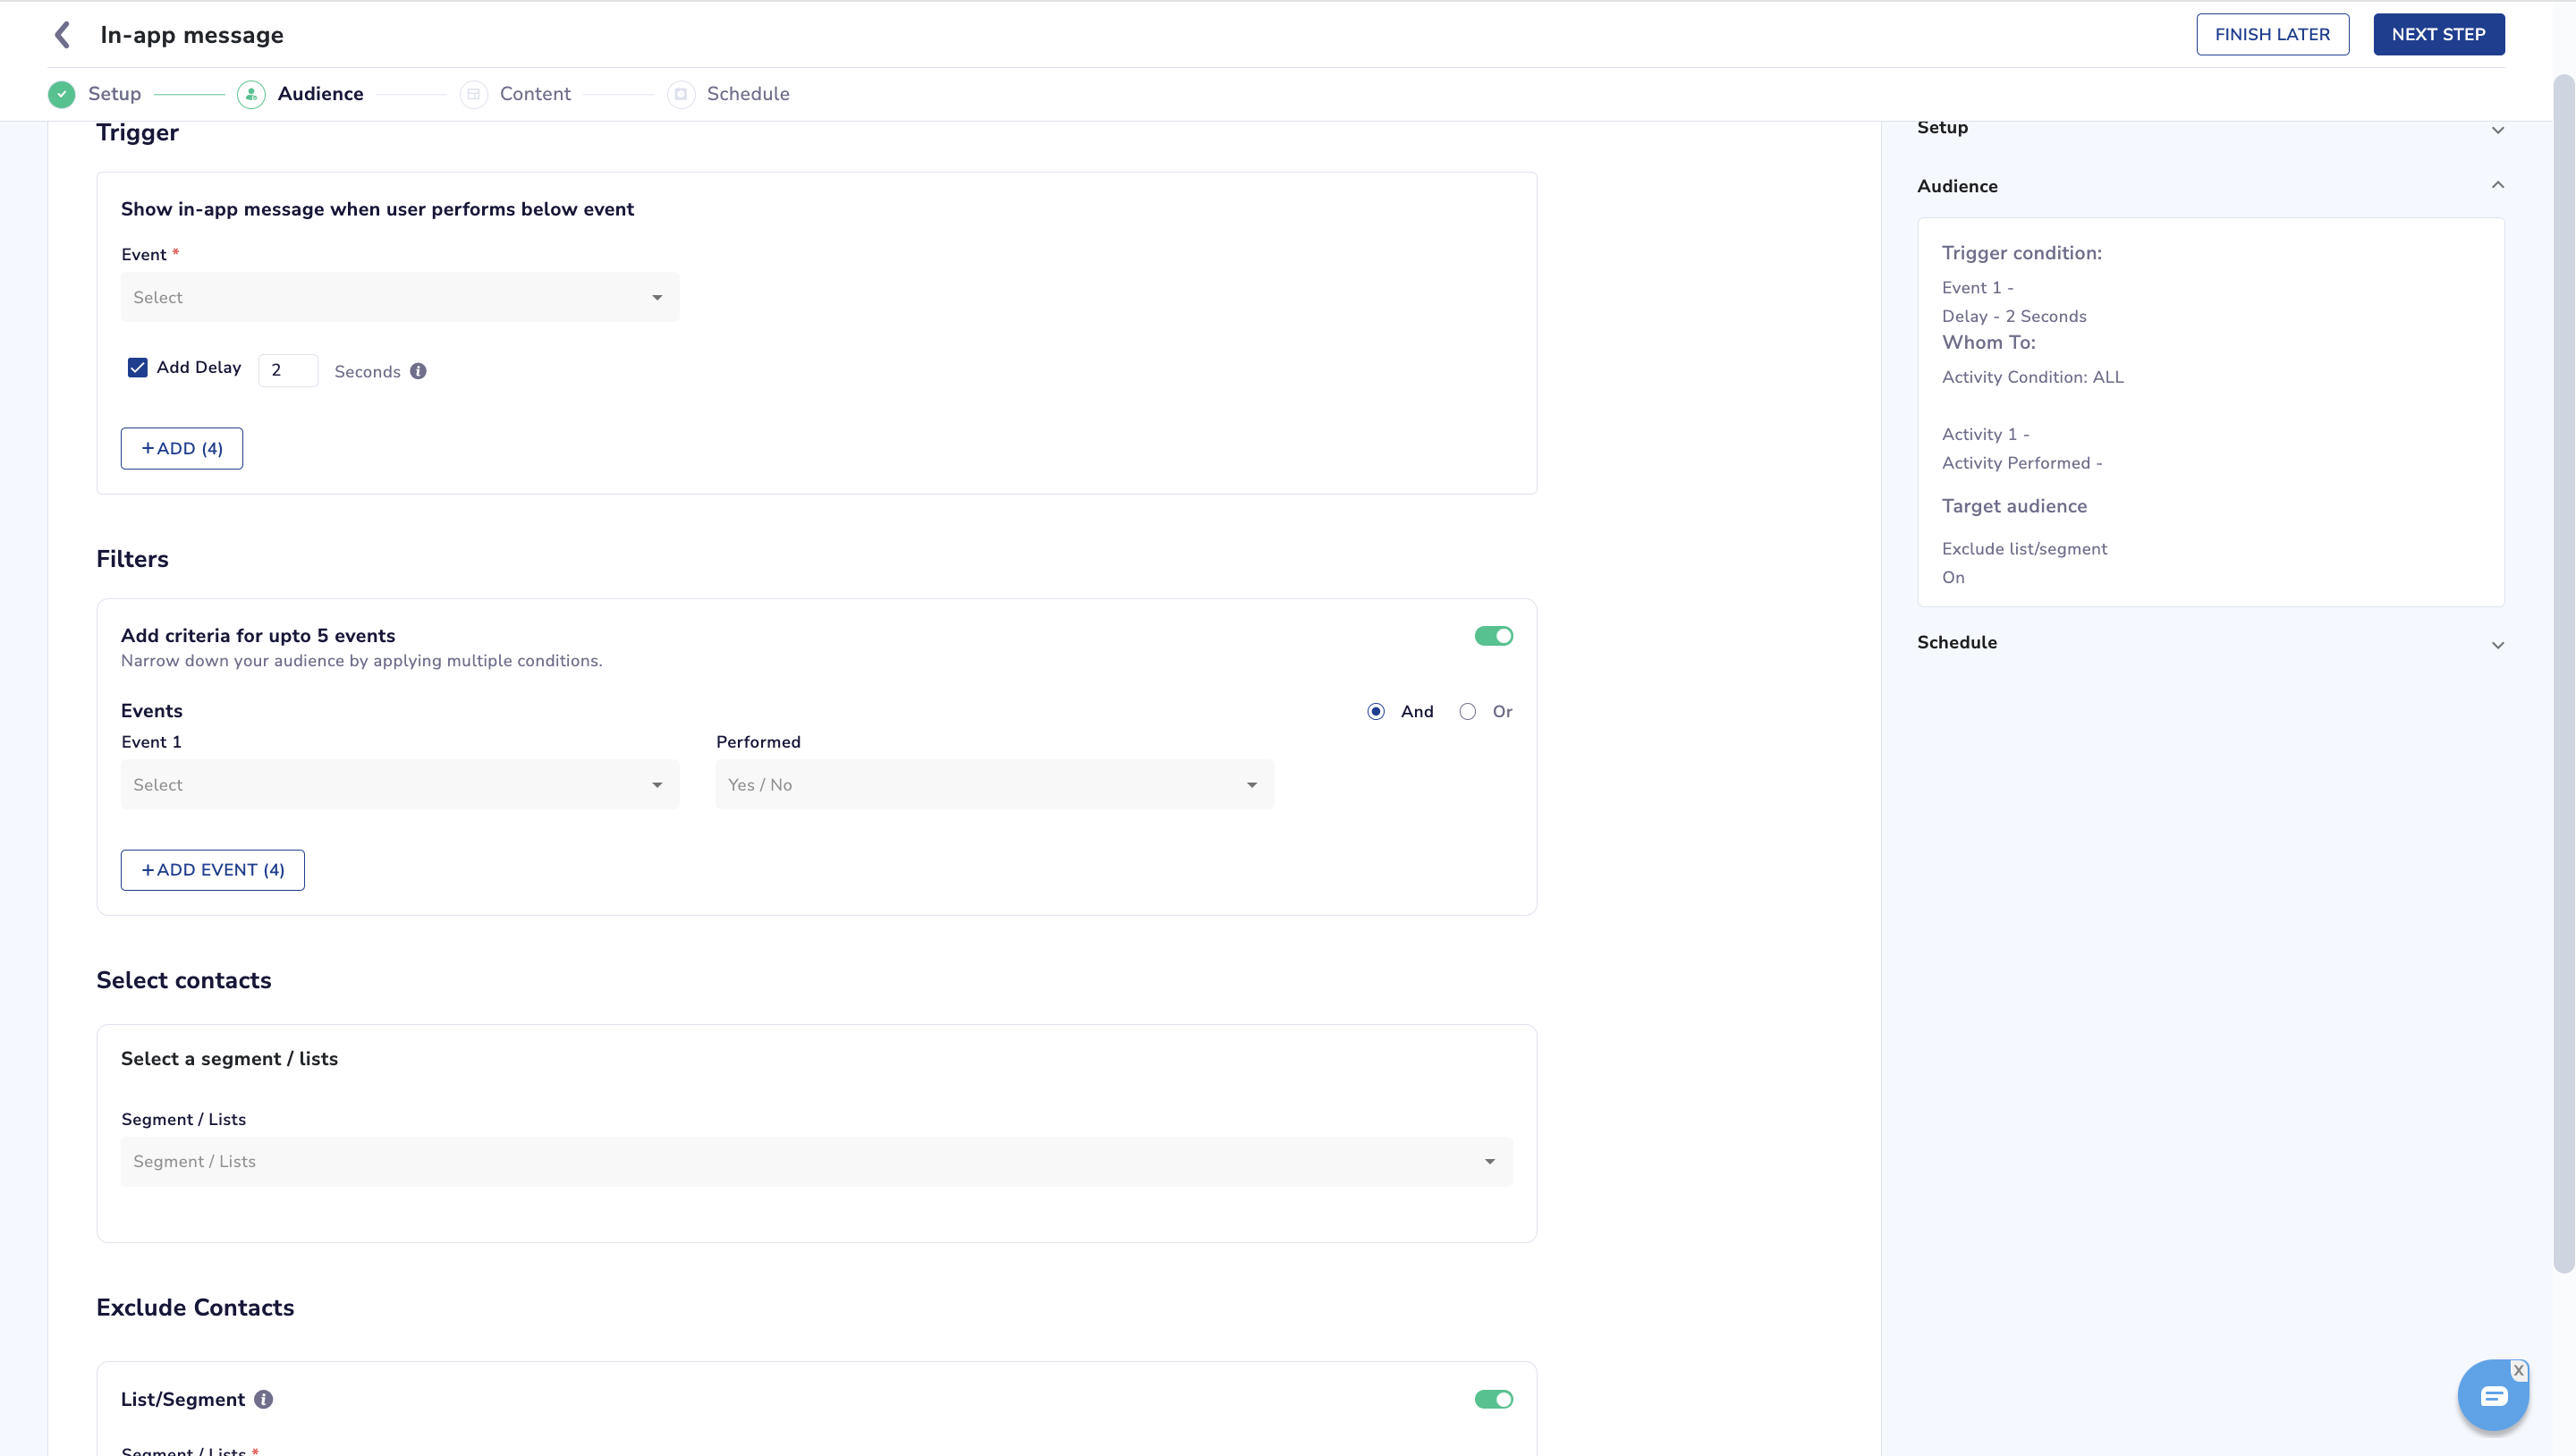
Trigger
The events selected in this section act as triggers for showing the in-app message to the app users. You can add up to 5 such trigger events here. In such a scenario, the in-app message is shown when a user does any of the defined events.
Here's how you can set a trigger event -
-
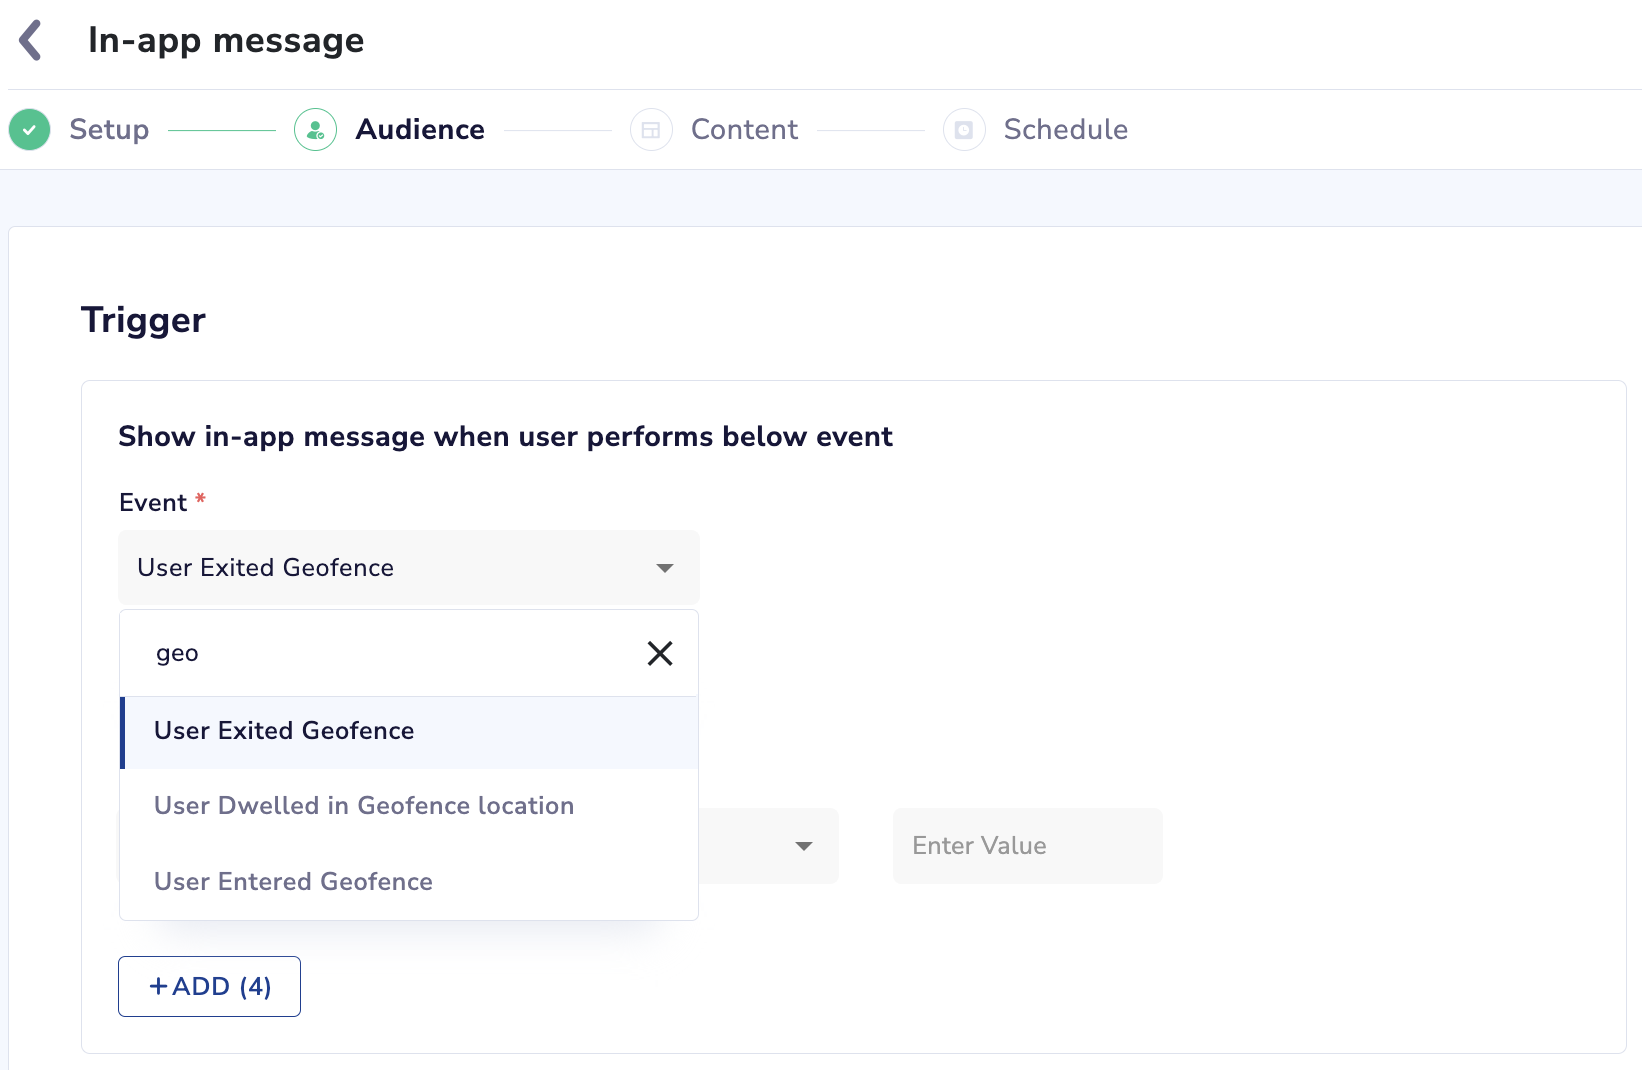
Event - You can select the event from the dropdown. E.g. Add to wishlist, App Launch, etc.
- Geofence events support - You can now choose from 3 geofence events as trigger events: User Exited Geofence (user moved out of the Area that is marked as a geofence), User Entered Geofence (user comes inside of a area that has been marked as a geofence), User Dwelled in Geofence (user has been inside the area marked as geofence for more than 15 minutes (dwell time))
- You can also select the following geofence criteria such as geofence name, geofence group etc. as a payload parameter
- To set up geofence, kindly refer to this document
- Geofence events support - You can now choose from 3 geofence events as trigger events: User Exited Geofence (user moved out of the Area that is marked as a geofence), User Entered Geofence (user comes inside of a area that has been marked as a geofence), User Dwelled in Geofence (user has been inside the area marked as geofence for more than 15 minutes (dwell time))
-
Delay - You can add a delay (max. up to 120 seconds) which will enable a time gap between the triggering event and the actual display of the message.
-
Specify parameters - You can also further provide payload parameter criteria for the selected event
-
You can add more than one trigger event & their respective delay if you want to show the exact same in-app message in the different sections of your app.
Minimum SDK version requirements
- For using multiple trigger events in your campaign, ensure that you are using Netcore Android SDK v3.1.23 and Netcore iOS SDK v3.1.10 onwards.
- For using the delay functionality, ensure that you are using Netcore Android SDK v3.5.0 and Netcore iOS SDK v3.5.0 onwards.
- For SDK version older than above mentioned versions, only the first event added will be used as trigger event.
Filters
Here, you can also specify certain conditions to define the base audience who should see the in-app message after the trigger event is performed.
- Event criteria - Use this option to set event-based criteria which essentially are client-side segments.
- Choose an event, and select whether the user should perform the Event as Yes or No
- In case of event performed: Yes, you can add further event conditions. Up to Max 5 conditions.
- In case of event performed: No, you can specify the wait period.
- You can also choose whether all conditions should work as AND or OR conditions. Please note the event performed: NO is available only for AND conditions.
- You can also specify event payload parameter criteria in terms of payload, operator, and values
- Geofence events can also be added as filter conditions
Select contacts
Here, you can also select a specific segment or list as a condition to define the base audience who should see the in-app message after the trigger event is performed.
- Select segment or list - In this section, you can select up to 5 user segments or lists. Use this option when you want to show the in-app message based on historical behavior which is captured by server-side user segments.
Exclude Contacts
Here, you can select the list or segment of users that are to be excluded from the In-app campaign after the trigger event is performed
- Select segment or list - In this section, you can select up to 5 lists or segments via multi-select dropdown. After 5 lists or segments have been chosen the multi-select will be disabled for rest of the lists.
Important
- Ability to select List & Segment and Multi event based conditions will be available for users who are on following SDK versions: Android SDK v2.2.19 and iOS SDK v2.5.5
- Please note that for using these targeting options for android, it is necessary that you migrate to AndroidX library if you haven't already.
- Please note that for event filter criteria, only last 200 events are considered stored locally on the device
- Exclude contacts functionality will be available for users who are on following SDK versions: Android SDK v3.5.0 and Netcore iOS SDK v3.5.0 onwards
Content
In this step, you will specify the content for the in-app message.
First, you need to choose the template layout from the following options:
- Sticky header
- Sticky footer
- Half interstitial
- Interstitial
- Cover
Below that you will find the option to 'Select template' that lists all the templates for the in-app message channel for the selected layout. You have the option to create a template from scratch with the following three options - text-only template, image-only template, or custom html template.

| Type | Feature | Sticky header/sticky footer | Half interstitial/interstitial | Full screen cover |
|---|---|---|---|---|
| Manual | Character limit | Message: 80 characters | Title: 35 characters Message: 150 characters | Message: 80 characters |
| Manual | Image | NA | NA | NA |
| Manual | Action button | up to 2 buttons, 15 characters | 1 button, 15 character | up to 2 buttons, 15 characters |
| Manual | Background color or background image | Yes | Yes | Yes |
| Manual | Personalisation | Yes | Yes | Yes |
| Image only | Image Format: .jpeg, .jpg, .png or add a url link | Size: 100 KB Resolution: 2:1 ratio | Half interstitial Size: 100 KB Resolution: 1:1 ratio Interstitial Size: 500 KB Resolution: 1:2 ratio | Size: 500 KB Resolution: 1:2 ratio |
| Image only | Action button | NA | NA | NA |
| Image only | Personalisation | Yes | Yes | Yes |
Note:
- Image size restrictions are recommended for optimal user experience and are applicable for images uploaded on the Netcore panel. If you wish to large size images, you can use a self-hosted image url feature.
- You can also personalize the in-app messages event payload parameters so that a personalized experience can be given to your customers. For more details, click here
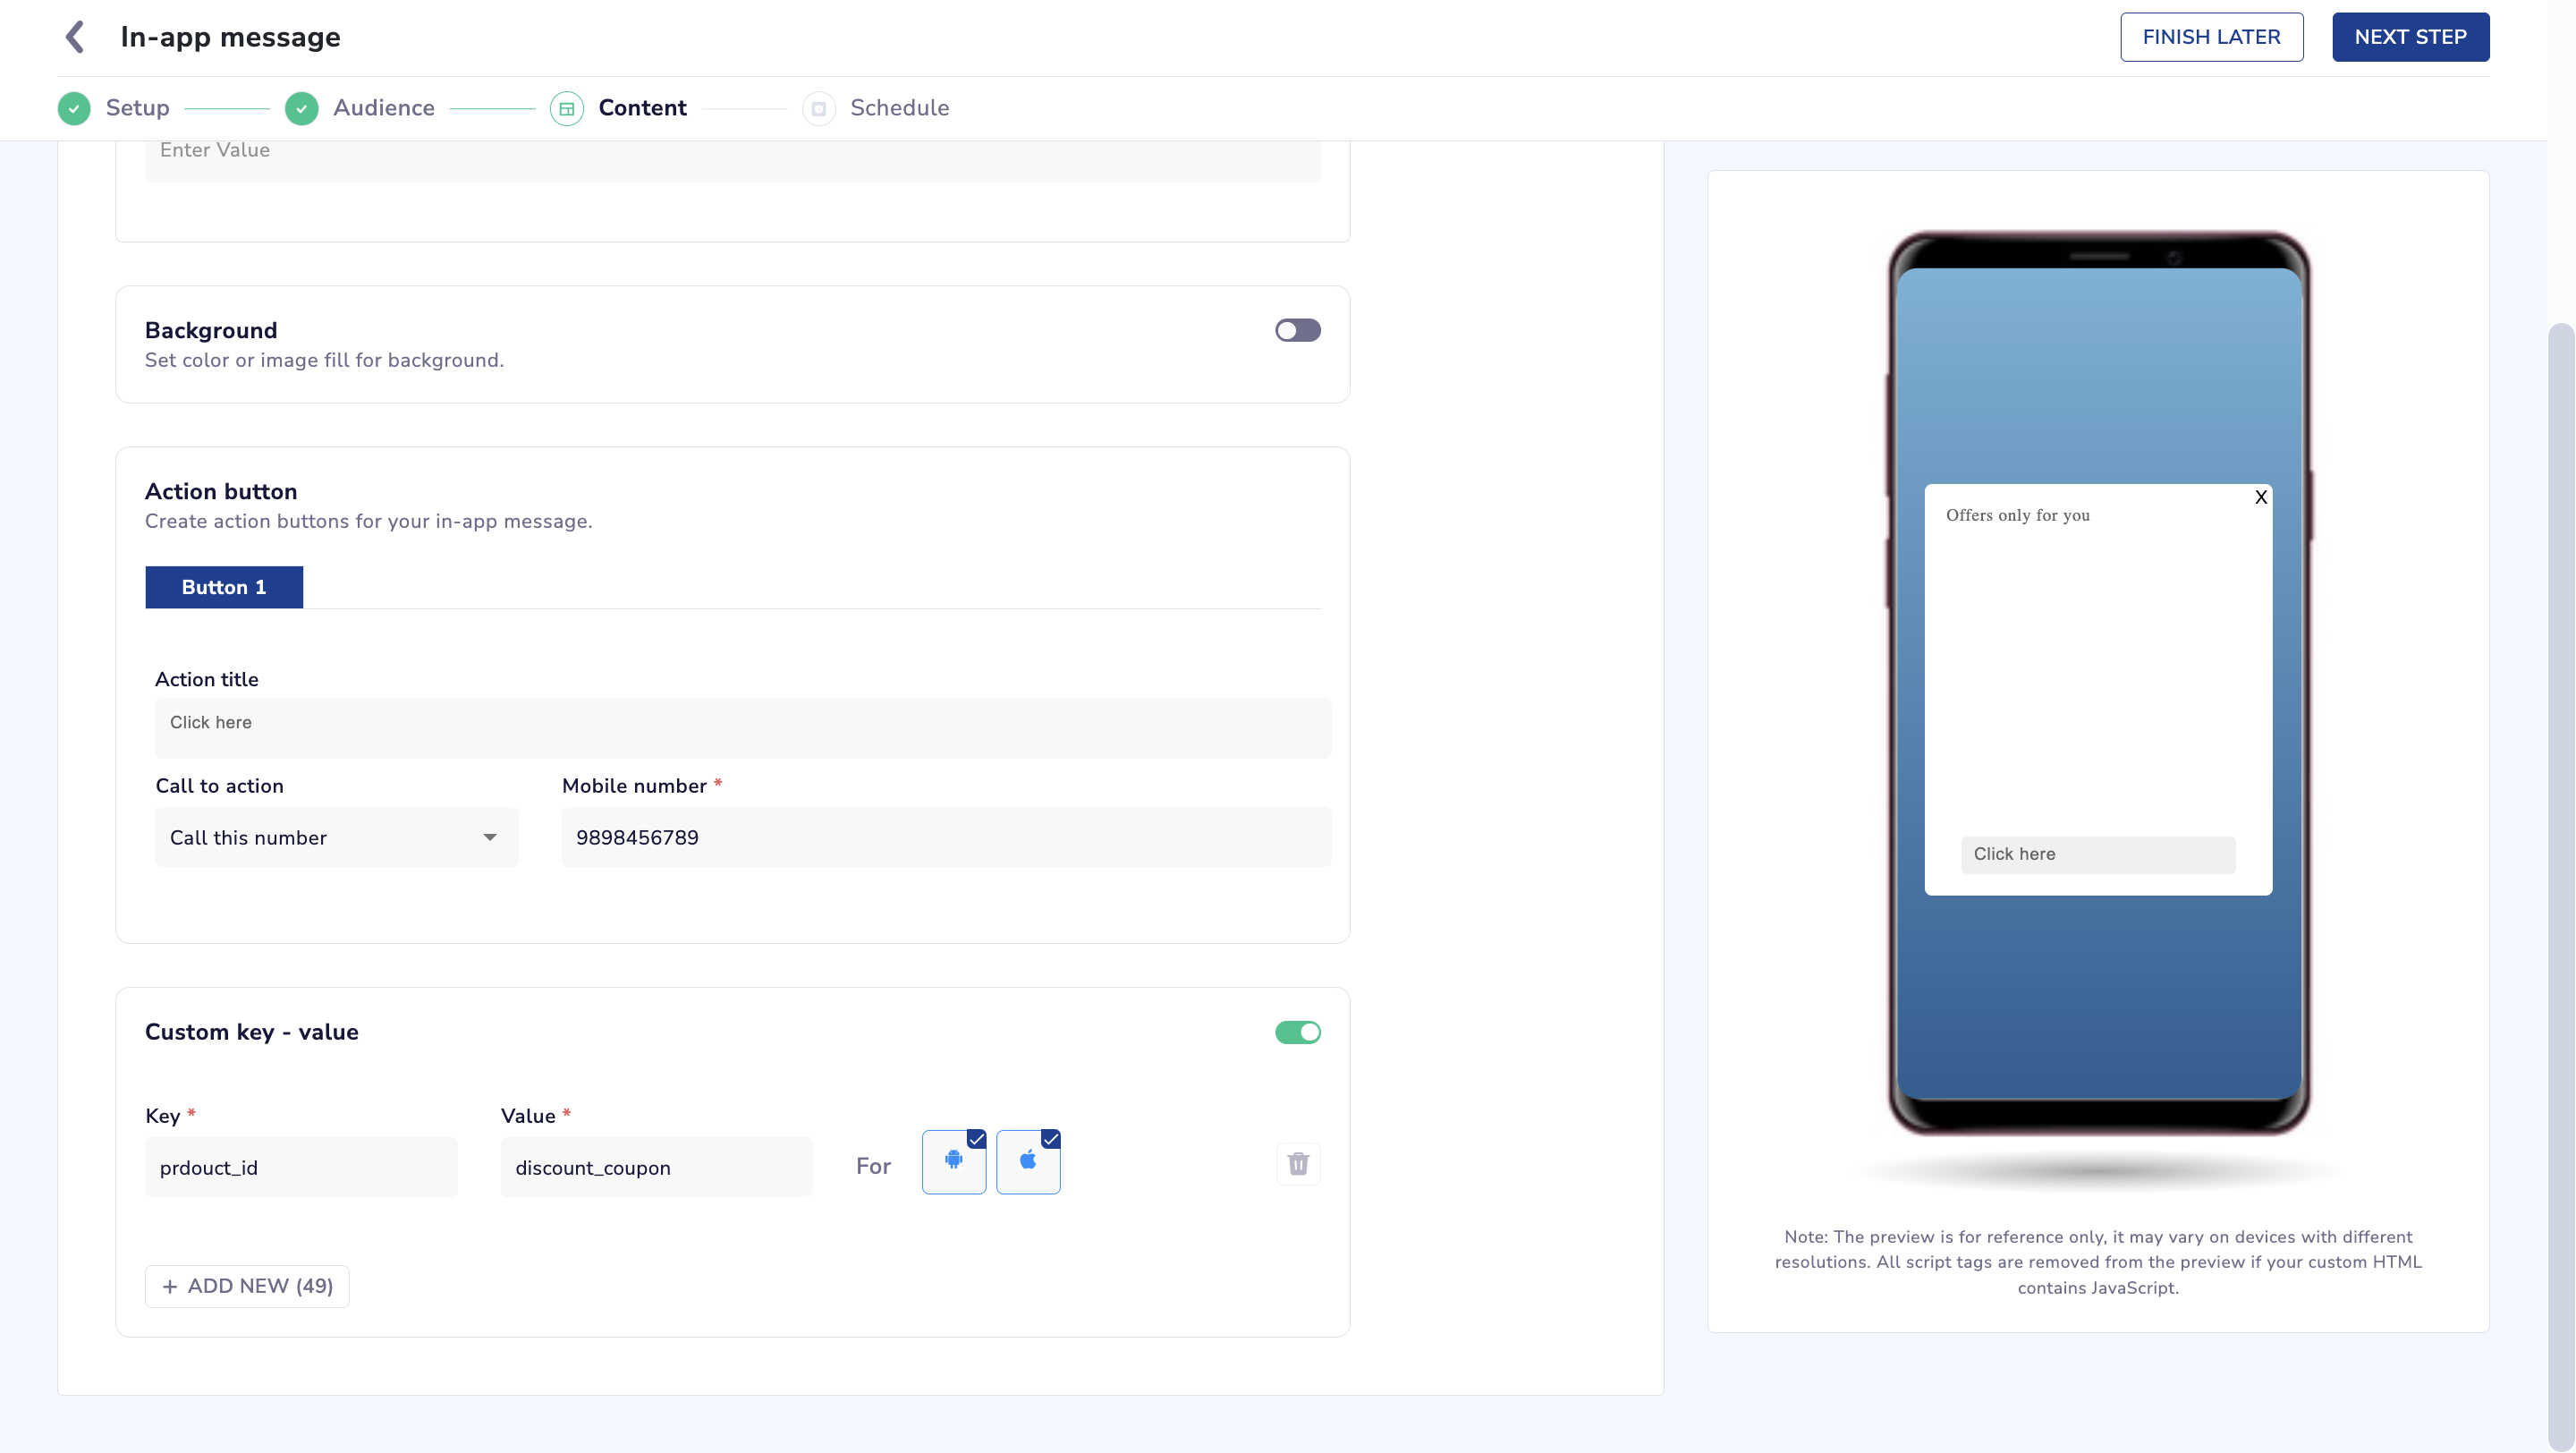
In Image-only templates of all layouts - you can add 1 call to action button.

CTA (call-to-action)
You can select from seven different call-to-actions as follow
- Redirect to deep link
- Patch a call (Validation on no. of digits between 6 to 15)
- Redirect to a website
- Send email
- Send SMS
- Even share the content through Whatsapp
- Close the In-App message.
Custom key-value pairs
Here, a custom key-value pair is a data structure used to send additional information along with the in-app message itself. It allows you to personalize the user experience and trigger specific actions within the app upon receiving the message
- Once enabled, user can set the custom key value data for specific android or iOS or both apps
- Users can set up to 50 custom key-value pairs
- Once toggle is enabled, user must add at least one key-value pair data. The same key name cannot be used more than once.
- Character validation for Key field: Only a-z A-Z 0-9 - _ . @ : ' / { } characters are allowed.
- Character validation for value field: Only a-z A-Z 0-9 - _ . @ : = & + % ? # ' / { } [ ] characters are allowed
- This data will be available whenever in-app message is clicked or dismissed
Note: Custom key-value pair functionality is available for Netcore Android SDK version 3.5.0 as well as iOS SDK version 3.5.0 and above
Custom HTML
Here, you can add custom HTML + JS to create your own content. You can use this option if you wish to get complete control of how the in-app message should look.
In this option, you have two options to add custom html content:
- Direct URL - You can specify the valid URL where your custom html is hosted.
- Inline HTML - You can continue further in 2 ways:
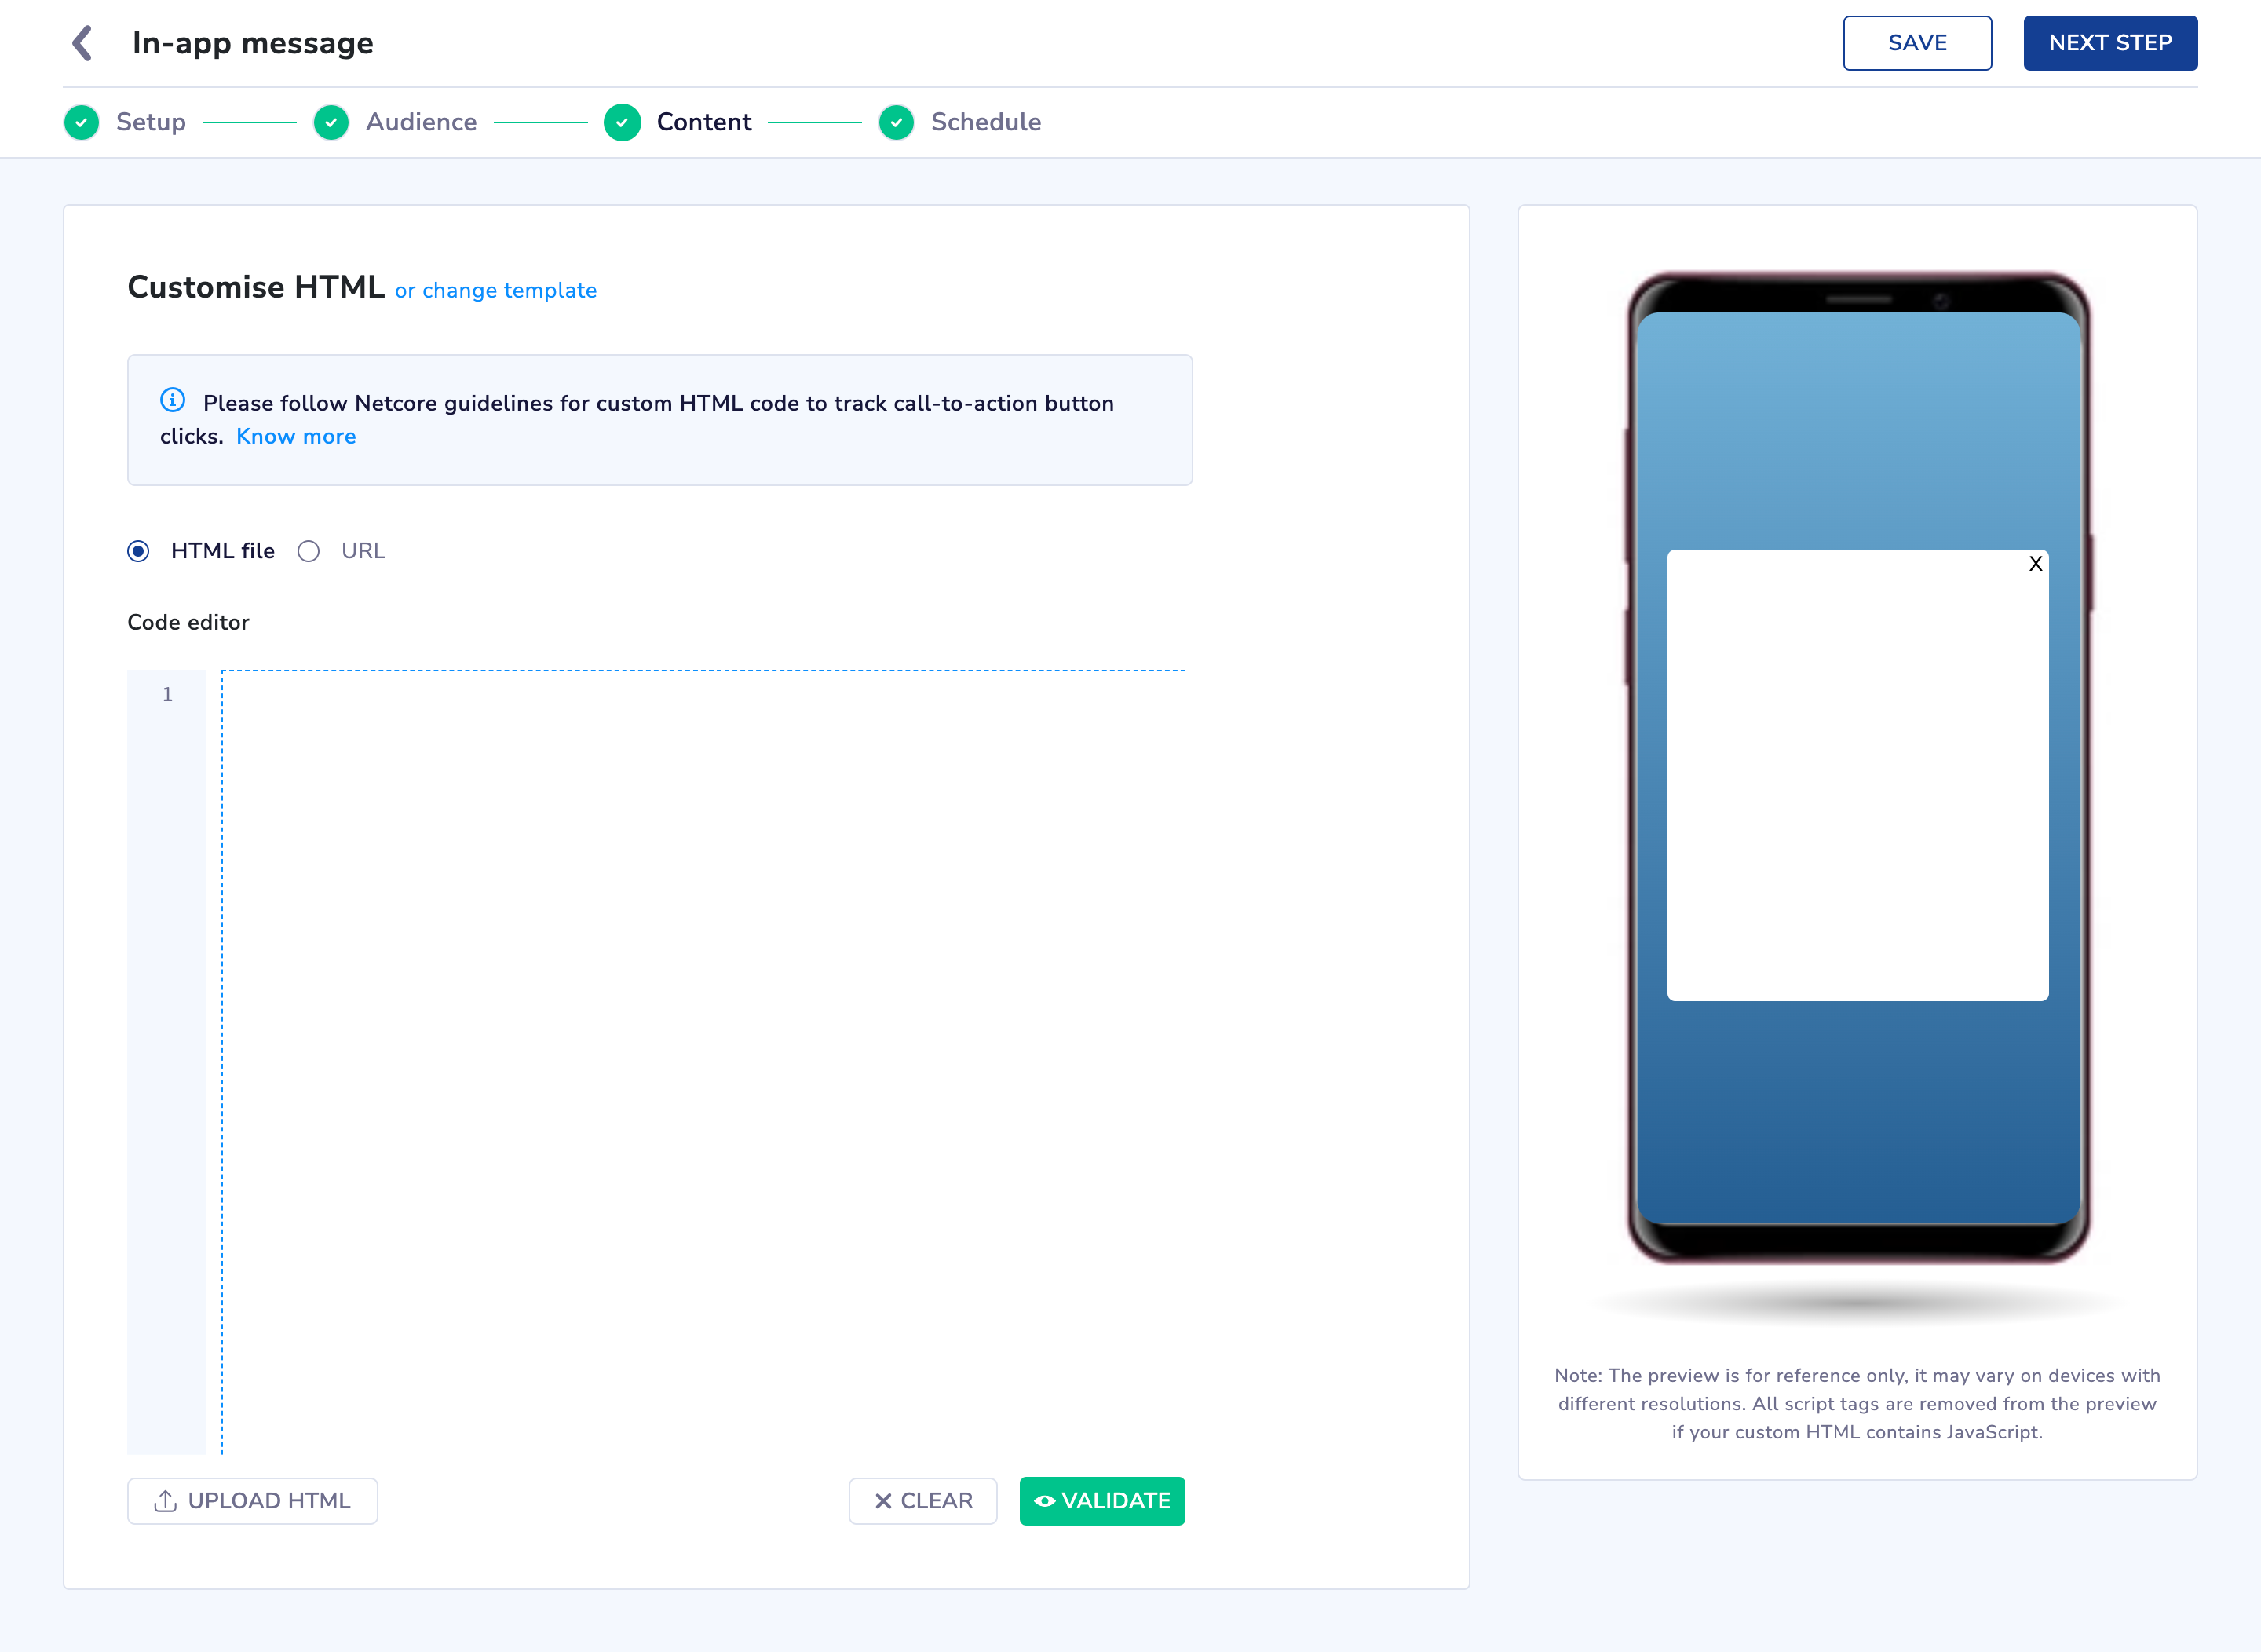
1. Create Custom Template - here you can copy and paste the content directly in the content box provided. While proceeding to next step, you will be provided an option to save it as a template or continue without saving.
Important
Please note that Direct URL under Custom html option will work on following SDK versions onward: iOS SDK version 2.4.3, Android SDK version 2.0.11 and 2.2.12 (Android X compatible)
However, please ensure that you confirm the custom html guidelines given in the next section in order to ensure the experience is smoother and the in-app message is shown to the user correctly.
2. Choose from the templates offered - Once you choose any template, you can make changes to its HTML in the "Pseudo Editor" and save it for future use.
Click here for guidelines on using custom HTML in In-app messages
Schedule
In this last step of campaign creation, you can specify the campaign start date and end date.
-
Start campaign - you can choose to publish the campaign now or at a later date and time.
-
End campaign - you can run campaign indefinitely or choose a particular date and time.

- Campaign frequency - You can also choose the frequency in terms of day of the week when you want to send the in-app messages and also the time of the day when it should be shown.
For the frequency of the campaign, you can choose how many times this campaign should be shown to the users.
- Every time - show the campaign every time the user comes on the website.
- Time per session - Number of times the campaign to be shown within a single session.
- Time per day - Number of times the campaign to be shown in a single day.
- Time per campaign - Total number of times the in-app message is to be shown of a particular campaign for as long as the campaign is running.
Preview
This section will provide you with a summary of the campaign details that you have created. So before publishing check all the details carefully.

Analyse campaign performance
On mouse-hover, by clicking on the ellipsis (3 dots) you can Clone a given campaign as well as download its reports, or by clicking on the campaign title you can see the preview of the campaign.

The entire campaign listing is now segregated based on campaign status and listed based on recency.
- Last modified - shows the date and time when the campaign was last edited.
- Ends - shows the date and time when the campaign ended or is going to end.
- Viewed - shows the number of times the in-app message has been viewed.
- Clicked - shows the number of times the in-app message has been clicked.
You can also toggle between the percentage and numeric values of the entire listing.
Search
The campaign listing page allows you to search any campaign by its name or id.
Filter
You can also filter based on Campaign Status such as scheduled, completed, failed, suspended, etc. as well as based on the Tags
Download Reports
This feature allows you to download reports of all or selected campaigns as well as schedule reports to be generated on a preset interval basis.

-
Schedule - Here you can select if you want to download the report just once or want to set-up a scheduler by selecting the recurring option.
-
Report type - Here if you select 'summary report', a overall summary of all your in-app campaigns would be downloaded immediately on your system as a csv file.
Summary report
| Report Attribute | Definition |
|---|---|
| Campaign name | List of all your in-app campaigns |
| Status | Each campaigns status which can be running, paused, scheduled or completed. |
| Start date | Date and time when the campaign was last edited |
| End date | Date and time when the campaign ended or is going to end |
| Viewed | Total number of times the in-app message has been viewed |
| Clicked | Total number of times the in-app message has been clicked |
| Unique user | Number of unique users who have viewed this in-app message |
On selecting the 'Custom detailed report' option, you can select the attributes and payload that you want to include in your report.
Custom detailed report
*Note: Attribute details are customizable and depend on what attributes you have added on your panel.* Hence, their definitions can vary from client to client.
| Attribute type | Report Attribute | Definition |
|---|---|---|
| Campaign details | Message ID | Unique campaign id |
| Campaign details | Campaign name | Unique name of the campaign |
| Campaign details | Primary Key | Unique user identifier |
| Campaign details | App name | Name of your app |
| Campaign details | App ID | Unique app ID |
| Campaign details | Tag | List of any special tags given to the campaign |
| Activity details | Viewed date | date and time when the user viewed the in-app message |
| Activity details | Clicked date | date and time when the user clicked the in-app message |
| Activity details | Closed date | date and time when the user closed the in-app message |
| Device details | OS type | OS of the user's device. Eg: iOS, Android |
| Device details | OS version | OS version of the user's device |
| Device details | App version | App version installed on the user's device |
| Device details | SDK version | SDK version of the app installed on the user's device |
| Device details | Make | Brand of the user's device |
| Device details | Model | User's device model |
Recurring option is selected when you want to schedule the reports for a particular time range and at the frequency chosen by you which can be Monthly, Weekly or Daily.

Custom detailed report allows you to choose manually the Campaigns details, Attribute details, Activity payloads and device details you want to include in your report.

Where to send
You can send these reports to either an email id configured on your panel or on any FTP location.

For any queries, please contact [email protected]
Updated about 1 month ago